Search News:


Archives by month:

April 2024
March 2024
February 2024
January 2024
December 2023
November 2023
October 2023
September 2023
August 2023
July 2023
June 2023
May 2023
April 2023
March 2023
February 2023
January 2023
December 2022
November 2022
October 2022
September 2022
August 2022
July 2022
June 2022
May 2022
April 2022
March 2022
February 2022
January 2022
December 2021
November 2021
October 2021
September 2021
August 2021
July 2021
June 2021
May 2021
April 2021
March 2021
February 2021
January 2021
December 2020
November 2020
October 2020
September 2020
August 2020
July 2020
June 2020
May 2020
April 2020
March 2020
February 2020
January 2020
December 2019
November 2019
October 2019
September 2019
August 2019
July 2019
June 2019
May 2019
April 2019
March 2019
February 2019
January 2019
December 2018
November 2018
October 2018
September 2018
August 2018
July 2018
June 2018
May 2018
April 2018
March 2018
February 2018
January 2018
December 2017
November 2017
October 2017
September 2017
August 2017
July 2017
June 2017
May 2017
April 2017
March 2017
February 2017
January 2017
December 2016
November 2016
October 2016
September 2016
August 2016
July 2016
June 2016
May 2016
April 2016
March 2016
February 2016
January 2016
December 2015
November 2015
October 2015
September 2015
August 2015
July 2015
June 2015
May 2015
April 2015
March 2015
February 2015
January 2015
December 2014
November 2014
October 2014
September 2014
August 2014
July 2014
June 2014
May 2014
April 2014
March 2014
February 2014
January 2014
December 2013
April 2012
August 2011
March 2011

Blogs Categories:

Codename News
Bush Whacker 2
Egg Breaker Adventures
Shards of Titan
Legacy Games
Crusaders of the Lost Idols
Tap Tap Movie
Idle Champions

Popular tags: [Clear Tags]

bw2, event, champions, idle, new content, update, crusaders, release notes, access, early, new, weekend, buff, champion spotlight, dragons, eba, videogame, game, dungeons, charity, mini, d&d, patch notes, idols, community, change log, objectives, legacy games, baldur's gate, nate, 2018, collector, fun, creature, halloween, summer, spotlight, contest, content, anniversary, idle champions, grand tour, 2017, high rollers, dungeons and dragons, 2023, quest, 2021, icewind dale.
November 10th, 2021
COTLI: November Tier 5 Objectives Update! 

What's better to brighten up your November than 14 all-new objectives to tackle? That's right, Amusement Park of Doom and Mme. Finklebottom's Revenge both get their Tier 5 objectives in today's update!


    Amusement Park of Doom Tier 5 Objectives


    Roller Coaster
    • Most changes from Tier 4 remain in effect.
      • New for Tier 5:
      • Sluggo monsters spawn randomly and live at least 5 seconds. Can be killed faster if targeted by Imani or Garnet.
      • Your DPS and Gold find stay at 0 for four times as long.
      • Areas get harder much more quickly.
      • Note: This will require having cleared the objective Bullet Hell from Ready Player Two to complete.
    • Beat area 700.
    • Awards 775 rubies.

    Carousel
    • Most changes from Tier 4 remain in effect.
      • New for Tier 5:
      • Sluggo monsters spawn randomly and live at least 5 seconds. Can be killed faster if targeted by Imani or Garnet.
      • Carousel seats now change every 50 areas.
      • Areas get harder much more quickly.
      • Note: This will require having cleared the objective Bullet Hell from Ready Player Two to complete.
    • Beat area 700.
    • Awards 775 rubies.

    Log Ride
    • Most changes from Tier 4 remain in effect.
      • New for Tier 5:
      • Sluggo monsters spawn randomly and live at least 5 seconds. Can be killed faster if targeted by Imani or Garnet.
      • Towel monsters now have annoying abilities as well as being invincible.
      • Areas get harder much more quickly.
      • Note: This will require having cleared the objective Bullet Hell from Ready Player Two to complete.
    • Beat area 700.
    • Awards 775 rubies.

    Ferris Wheel of Doom
    • Most changes from Tier 4 remain in effect.
      • New for Tier 5:
      • Sluggo monsters spawn randomly and live at least 5 seconds. Can be killed faster if targeted by Imani or Garnet.
      • Areas get harder much more quickly.
      • Note: This will require having cleared the objective Bullet Hell from Ready Player Two to complete.
    • Beat area 700.
    • Awards 775 rubies.

    The House of Horrors
    • Most changes from Tier 4 remain in effect.
      • New for Tier 5:
      • Sluggo monsters spawn randomly and live at least 5 seconds. Can be killed faster if targeted by Imani or Garnet.
      • The random effects are even stronger than ever.
      • Areas get harder much more quickly.
      • Note: This will require having cleared the objective Bullet Hell from Ready Player Two to complete.
    • Beat area 700.
    • Awards 775 rubies.

    Mauled by Mascots
    • All changes from Tier 4 remain in effect.
      • New for Tier 5:
      • Sluggo monsters spawn randomly and live at least 5 seconds. Can be killed faster if targeted by Imani or Garnet.
      • Each Mascot also reduces Gold find by 50% (stacks multiplicatively.)
      • Areas get harder much more quickly.
      • Note: This will require having cleared the objective Bullet Hell from Ready Player Two to complete.
    • Beat area 700.
    • Awards 775 rubies.

    Couples Day
    • Most changes from Tier 4 remain in effect.
      • New for Tier 5:
      • Sluggo monsters spawn randomly and live at least 5 seconds, but can be killed faster if hit by a projectile first.
      • Crusader levels and upgrades now cost more, and monsters drop less gold.
      • Areas get harder much more quickly.
      • Note: This will require having cleared the objective Bullet Hell from Ready Player Two to complete.
    • Beat area 700.
    • Awards 775 rubies.


      Mme. Finklebottom's Revenge Tier 5 Objectives


      The Journey of the Ring
      • Most changes from Tier 4 remain in effect.
        • New for Tier 5:
        • Invisible Mollug monsters randomly spawn and can't be hurt until clicked to be made visible. Mollugs can only be killed by projectile damage.
        • The Ring monsters now spawn more frequently.
        • Areas get harder much more quickly.
        • Note: This will require having cleared the objective Bullet Hell from Ready Player Two to complete.
      • Beat area 750.
      • Awards 800 rubies.

      Call in the Eagles!
      • Most changes from Tier 4 remain in effect.
        • New for Tier 5:
        • Invisible Mollug monsters randomly spawn and can't be hurt until clicked to be made visible. Mollugs can only be killed by projectile damage.
        • Bird seed monsters now spawn more frequently.
        • Areas get harder much more quickly.
        • Note: This will require having cleared the objective Bullet Hell from Ready Player Two to complete.
      • Beat area 750.
      • Awards 800 rubies.

      Let's Dial In
      • All changes from Tier 4 remain in effect.
        • New for Tier 5:
        • Invisible Mollug monsters randomly spawn and can't be hurt until clicked to be made visible. Mollugs can only be killed by projectile damage.
        • Crusaders levels and upgrades cost more, and monsters drop less gold.
        • Areas get harder much more quickly.
        • Note: This will require having cleared the objective Bullet Hell from Ready Player Two to complete.
      • Beat area 750.
      • Awards 800 rubies.

      It's the Climb
      • All changes from Tier 4 remain in effect.
        • New for Tier 5:
        • Invisible Mollug monsters randomly spawn and can't be hurt until clicked to be made visible. Mollugs can only be killed by projectile damage.
        • Your DPS spends even longer at 0.
        • Areas get harder much more quickly.
        • Note: This will require having cleared the objective Bullet Hell from Ready Player Two to complete.
      • Beat area 750.
      • Awards 800 rubies.

      It's Getting Hot in Here
      • Most changes from Tier 4 remain in effect.
        • New for Tier 5:
        • Invisible Mollug monsters randomly spawn and can't be hurt until clicked to be made visible. Mollugs can only be killed by projectile damage.
        • Mollug monsters count as 10 monster kills for the volcano's death count.
        • Areas get harder much more quickly.
        • Note: This will require having cleared the objective Bullet Hell from Ready Player Two to complete.
      • Beat area 750.
      • Awards 800 rubies.

      Vertical Limits
      • Most changes from Tier 4 remain in effect.
        • New for Tier 5:
        • Invisible Mollug monsters randomly spawn and can't be hurt until clicked to be made visible. Mollugs can only be killed by projectile damage.
        • Only Male Supernatural Crusaders may be used.
        • Areas get harder much more quickly.
        • Note: This will require having cleared the objective Bullet Hell from Ready Player Two to complete.
      • Beat area 750.
      • Awards 800 rubies.

      Dead Snow
      • Most changes from Tier 4 remain in effect.
        • New for Tier 5:
        • Invisible Mollug monsters randomly spawn and can't be hurt until clicked to be made visible. Mollugs can only be killed by projectile damage.
        • When a lesser zombie is killed, they damage the formation by 35% of the Crusaders' max health.
        • Areas get harder much more quickly.
        • Note: This will require having cleared the objective Bullet Hell from Ready Player Two to complete.
      • Beat area 750.
      • Awards 800 rubies.


      New Achievements!

      Unlock the two new in-game achievements fore these campaigns!

      • Doors to the Stars - Kill 10,000 Sluggos in Tier 5 or higher Amusement Park of Doom objectives.

      • Game of Riddles - Kill 10,000 Mullogs in Tier 5 or higher Mme. Finklebottom's Revenge objectives.
August 26th, 2021
COTLI: Dr. Evil's Summer Sabotage Y6 

Swim, Run, Bike. Our latest Crusader excels at all of these sports. It's time for Dr. Evil's Summer Sabotage 6!

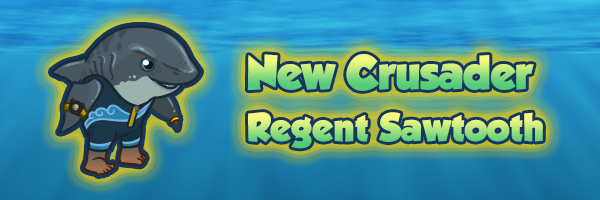
Dr. Evil's Summer Sabotage 6 has arrived, bringing with it the Regent Sawtooth.

This year's event runs until Tuesday, September 7th at 12:00 PM Pacific Time (UTC -7), introducing Regent Sawtooth and bringing back Oona, Para Rugby Star, Veronica, the Android Archer, Bubba, the Swimming Orc, The Gold Hound, Milgrid the Mining Mage, Dr. Evil, PhD, and Euodia, the Fencer!

New Tier 6 Crusader: Regent Sawtooth

Tags: Event, Human, Animal, Male, Evil, Magical, Healer, Tank


Just when you thought it was safe to go back into the water...it was actually.

Regent Sawtooth isn't always in the ocean. Sometimes he's on dry land training for the various triathlons he enters, or off running "errands." And now he's interested in joining your band of Crusaders, to see what other errands he can do out in the multiverse.

Don't worry though: since you're now family, he'll look after you, providing some healing when he's in the formation, and he's got the connections to make the active abilities like Click-o-Rama, Savage Strikes et al last longer. Those are some good connections.

But maybe you should still sleep with one eye open, just in case.

Regent Sawtooth is a Support and Healer Crusader. When you want to add him to your formation, you can find him in slot 31.

New Tier 6 Objectives

  • Recruit Regent Sawtooth | Regent Sawtooth takes up a slot in the formation. Veronica, the Android Archer and Bubba, the Swimming Orc take up spots in formation and can't be moved. Acquaintances of Regent Sawtooth randomly attack the formation, trying to just "have a chat.". Note: This will require having cleared the objective To Infinity and Beyond on Ghostbeard's Greed to complete. Reach area 600.

  • Sniffing Out Sabotage |The Goldhound and Milgrid the Mining Mage take up spots in formation and can't be moved. Aside from the locked-in crusaders, only Evil tagged crusaders can be used. Powerful robots attack your formation, healing all monsters and firing lasers from range. Note: This will require having cleared the objective To Infinity and Beyond on Ghostbeard's Greed to complete. Reach area 650.

  • Doctor Doctor | Dr. Evil, PhD takes up a spot in formation and can't be moved.Aside from the locked-in crusader, only Evil tagged crusaders can be used. Horrible Experiment can't be disabled. A rival doctor occupies a slot in the formation and damages the Crusaders infected with Horrible Experiment by 15% of their health per second. The rival doctor also provides a 200% DPS buff, multiplicative per infected Crusader. Note: This will require having cleared the objective To Infinity and Beyond on Ghostbeard's Greed to complete. Reach area 675.

  • Bout with Evil | Euodia the Fencer takes up a spot in formation and can't be moved All area quests are now kill 50 monsters. Aside from the locked-in crusader, only Evil tagged Crusaders can be used. The formation has been changed. Quest requirements are tripled. Note: This will require having cleared the objective Bullet Hell on Ready Player Two to complete. Reach area 700.

  • Rugby Perils | Oona, Para Rugby Star takes up a spot in formation and can't be moved. Aside from the locked-in Crusader, only Evil tagged crusaders can be used. Only Oona does DPS. Note: This will require having cleared the objective Bullet Hell on Ready Player Two to complete. Reach area 725.

More info

You'll have until Tuesday, September 7th at 12:00 PM Pacific Time (UTC -7) to complete Dr. Evil's Summer Sabotage 6!

For more info on previous Dr. Evil's Summer Sabotage Crusaders and objectives check out the Dr. Evil's Summer Sabotage 5 blog post.

Equipment for event Crusaders can be found in Crusader Games Silver and Jeweled Chests, which you can earn from objectives and the free play or buy in the shop. Each non-recruitment objective will drop a chest for its given tier of Crusaders, and free play will drop All Tier chests. Gear for Tier 2, Tier 3, Tier 4, Tier 5, and Tier 6 Crusaders will only appear in All Tier chests once you've unlocked the respective Crusaders. You can select the tier of chest you buy in the shop when you go to purchase chests with real money or event currency.

June 9th, 2021
Idle Champions: Dragondown 4 
Posted in Idle Champions.

At the mouth of the River Mirar in the northwest of the Sword Coast lies the port city of Luskan, also known as the City of Sails. Officially governed by the five High Captains, Luskan is actually secretly run by Jarlaxle Baenre and the Bregan D'aerthe.

And they need your help.

While celebrating the Summer Solstice with a smaller scale version of Waterdeep's Dragondown festival, Luskan has managed to draw the attention - and the wrath - of a Bronze Dragon and their kin...

Dragondown 4 introduces Selise Astorio, Human Paladin of the Rivals of Waterdeep, and brings back Nova, the knowledge-hungry Genasi Warlock from High Rollers: Aerois, and Korth, the ruthless Lizardfolk Fighter. Players have until Monday, June 21st at 12PM Pacific to complete their 4 unlocks and objectives.

For more information about Year 4 Events and how they work, please check out our Year 4 Events Dev Blog.

I. New Champion: Selise

Dungeons & Dragons Selise Tanya DePass

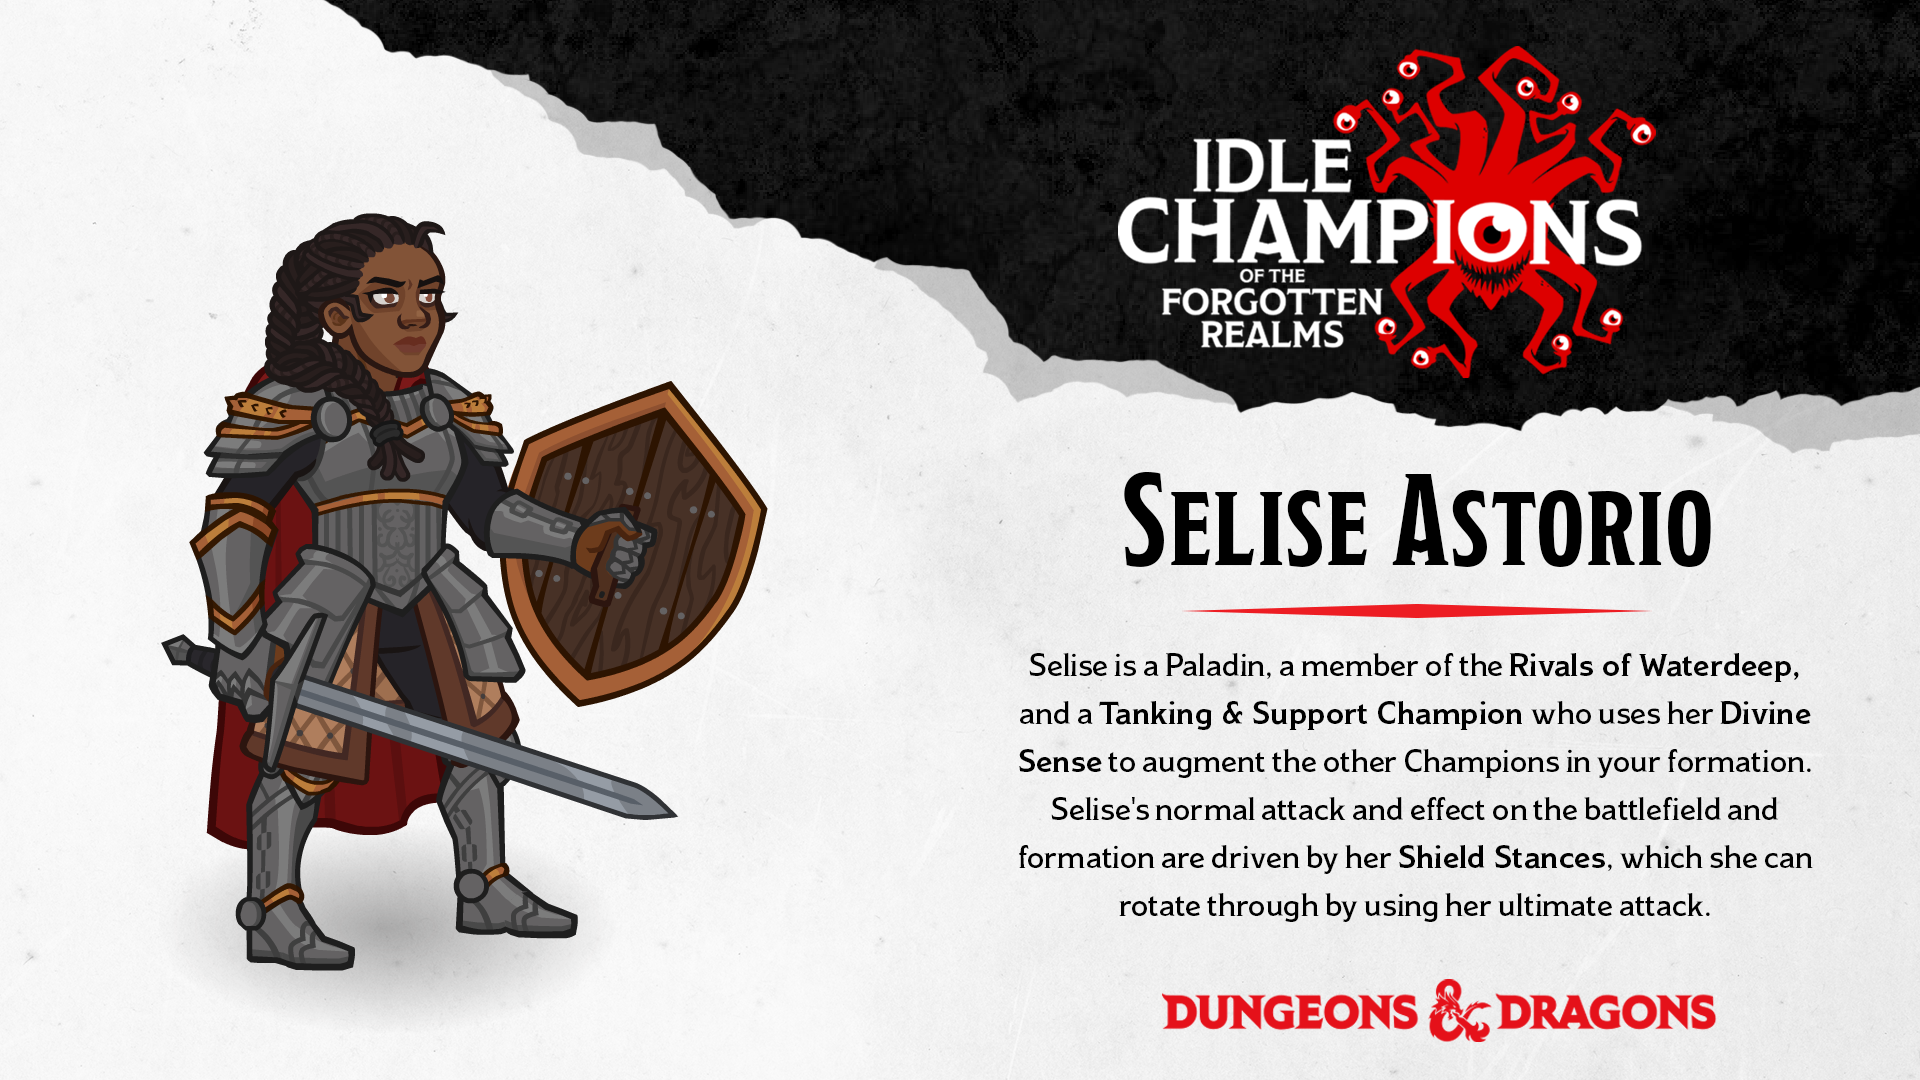
    With steadfast confidence and a knowing smirk, Selise is ready to jump into battle whenever necessary, though afterward, she may pine for a hot bath. She keeps her wife’s ring on a chain around her neck and her well-worn Psychomancy shield on her arm. Despite losing her connection to her God after dispatching the one she swore vengeance upon, Selise continues to try to help those in need, even if sometimes she takes the morally gray path.


Selise knows a thing or two about using her shield, and can change her stance with that shield to buff the party in a variety of ways. When you want to add her to your formation, you can swap her with Arkhan (Slot 12)

II. Selise’s Stats

Race: Human Alignment: Lawful Neutral
Class: Paladin Gender: Female
Age: 42 Affiliation: Rivals of Waterdeep

STR: 19 DEX: 11 CON: 11
INT: 15 WIS: 13 CHA: 15

Role: Tanking and Support
Eligible for Patrons: Strahd von Zarovich, Zariel
Slot: 12 (Arkhan)


Selise's Design

Using her Divine Sense to detect enemies around her, Selise can leverage that knowledge to better prepare for battle. She prefers to be in the front lines of a formation, increasing the damage of those behind her and offering extra buffs depending on her current shield stance. When the time is right to strike, her Thunderous Smite will decimate an entire group of foes!

For more information on Selise and her abilities, check out her Champion Spotlight!


Year Four Variants


  • Stalwart Supporters — Selise starts in the formation. She can be moved or removed. Only Champions with STR of 13 or higher can be used.
      Getting to know Selise: Each time you trigger her ultimate attack, she switches shield stances. Each shield stance (Aggressive, Wall, Deflect, and Last Resort) changes the way her normal attack works, and also how Divine Sense buffs Champions in the two columns behind her.
  • Reach Area 75.
  • Tears of Tyr — - Selise starts in the formation. She can be moved or removed. While in outdoor areas, rain falls, increasing the speed and attack damage of enemies by 100%. Champions' base attack cooldowns are increased by 1 second. Only Champions with a WIS of 13 or higher can be used.
      Getting to know Selise: Keep Selise in her Aggressive shield stance to keep Champions attacking as quickly as possible!
  • Reach Area 125.
  • The Endless Claws — Selise starts in the formation. She can be moved or removed. Crawling Claws appear in each area (3 after the first wave). They deal 200% additional damage. When a Crawling Claw is destroyed by anyone other than Selise Astorio, it immediately respawns and continues its attack! Crawling Claws do not count towards quest progress, nor do they drop any gold.
      Getting to know Selise: Her Last Resort shield stance is optimal for this variant, as it has a small AOE. Using her ultimate to switch between Last Resort and Aggressive shield stances will trigger Thunderous Smite, allowing her to attack even more enemies and clear the field of Crawling Claws!.
  • Reach Area 175.
For information on previous years' variants, check out the Dragondown 3 blog.
August 28th, 2020
COTLI: Mme. Finklebottom's Revenge, Tier 4! 

The time has come, the time is now, for the Tier 4 objectives for the Mme. Finklebottom's Revenge campaign!

Tackle these objectives once again, to help build your ruby stash up. We've highlighted what has changed with them for Tier 4, but they still have all the fun changes added along the way in previous tiers as well.

Objectives

  • The Journey of the Ring
  • Reach area 1000.
  • Hobbits change positions every 250 areas now.
  • Ring Reapers will now one-shot the Crusaders if they reach the formation.
  • Awards 650 rubies.
  • Call in the Eagles!
  • Reach area 1050.
  • Only Animal Crusaders can be used.
  • Awards 700 rubies.
  • Let's Dial In
  • Reach area 1050.
  • Some of the spawned monsters can only be damaged by projectiles.
  • Awards 700 rubies.
  • It's the Climb
  • Reach area 1100.
  • Healing abilities are ineffective.
  • Awards 700 rubies.
  • It's Getting Hot in Here
  • Reach area 1200.
  • The random buffs from the volcano become more powerful every time a Crusader dies.
  • Awards 700 rubies.
  • Vertical Limits
  • Reach area 1100.
  • Only Supernatural Crusaders can be used.
  • Awards 700 rubies.
  • Dead Snow
  • Reach area 1200.
  • Tough zombies now spawn after 3 lesser zombies are killed.
  • Awards 700 rubies.
This weekend, we're also offering the Flash Sale Frenzy. Starting at 11am Pacific Time (UTC-7) today, Friday, August 28th, 2020, and running until Monday, August 31st, 2020 at Noon Pacific Time (UTC-7), you'll get a new flash sale offer every 6 hours, or every time you purchase your current flash sale, if you are missing any of the Golden Epics on the list we've curated. If you own all the golden items from the list, the game will continue to offer you flash sales, if there are still ones you are missing for the Crusaders you own.

Enjoy!
August 13th, 2020
COTLI: Dr. Evil's Summer Sabotage 5! 

Five years, five summer games -- and five times sabotaged by Dr. Evil.

Dr. Evil's Summer Sabotage returns, bringing a Para Rugby Crusader into play. Oona, Para Rugby Star promises to be a superbly-powerful DPS Crusader in the right formation. We can't wait!

This year's event runs until Tuesday, August 25th at 12PM PDT, introducing Oona, Para Rugby Star and bringing back Veronica, the Android Archer, Bubba, the Swimming Orc, The Gold Hound, Milgrid the Mining Mage, Dr. Evil, PhD, and Euodia, the Fencer!

New Tier 5 Crusader: Oona, Para Rugby Star

Tags: event, DPS, female, elf


    ANNOUNCER 1: Have you ever watched Para Rugby?
    ANNOUNCER 2: It's scary!
    ANNOUNCER 1: And there's no one scarier on the field than Oona, Para Rugby Star.
    ANNOUNCER 2: The fact that she is a Record Chaser is certainly noteworthy - her DPS increases exponentially as the enemy spawn rate increases.
    ANNOUNCER 1: Whoa!
    ANNOUNCER 2: Yeah, it combines well with her Elven Stamina, which increases her DPS for every 25 levels over and including 200, multiplying her DPS by a factor of 4.
    ANNOUNCER 1: What about her Blueshift? Have you seen that?
    ANNOUNCER 2: I haven't yet, but I hear it somehow makes enemies weaker, reducing their effective level by 25 while retaining their damage and gold values.
    ANNOUNCER 1: And of course, she also plays Murderball.
    ANNOUNCER 2: Don't get me started on that - she's a force to be reckoned with! She can Turn on a Dime and improve Record Chaser even further.
    ANNOUNCER 1: Would you say she has 'No Limits'?
    ANNOUNCER 2: I certainly would. She is an asset to any formation.


New Tier 5 Objectives

  • Recruit Oona, Para Rugby Star | Oona, Para Rugby Star and two cheerleaders take up slots in the formation, moving every 100 areas. Cheerleaders buff gold found when gold-finding Crusaders are adjacent to them. DPS crusaders are unavailable.
    Reach area 400.

  • Quadrathlon | The four sketchy clones are back, each with a unique annoying power.
    Reach area 450.

  • Cauldron of Flame | There's a volcano in the formation! Upon entering each area, the volcano erupts, spawning between 5 and 10 indestructible fire monsters.
    Reach area 475.

  • Sporting Supplies | Demonic sports supplies occupy six prime slots in the formation.
    Reach area 500.

  • Golden Gun | A mysterious man occupies a slot in the formation, and buffs your DPS.
    Reach area 525.

Help! Where’s the Loot?

Equipment for event Crusaders can be found in Silver and Jeweled Crusader Games Chests, which you can earn from objectives and the free play or buy in the shop. Each non-recruitment objective will drop a chest for its given tier of Crusaders, and free play will drop All Tier chests. Gear for Tier 2, Tier 3, Tier 4 and Tier 5 Crusaders will only appear in All Tier chests once you've unlocked the respective Crusaders. You can select the tier of chest you buy in the shop when you go to purchase chests with real money or event currency.

What About Older Event Crusaders?

Previously available Tier 1, Tier 2, Tier 3, and Tier 4 Crusaders are once again available to unlock as part of Dr. Evil's Summer Sabotage 5. For more information about those Crusaders, check out our Event Blogs from previous years:


Players will have until Tuesday, August 25th at 12:00PM PDT to complete Dr. Evil's Summer Sabotage 5.
June 3rd, 2020
Idle Champions: Dragondown 3 
Posted in Idle Champions.

At the mouth of the River Mirar in the northwest of the Sword Coast lies the port city of Luskan, also known as the City of Sails. Officially governed by the five High Captains, Luskan is actually secretly run by Jarlaxle Baenre and the Bregan D'aerthe.

And they need your help.

While celebrating the Summer Solstice with a smaller scale version of Waterdeep's Dragondown festival, Luskan has managed to draw the attention - and the wrath - of a Bronze Dragon and their kin...

Dragondown 3 introduces Nova, the knowledge-hungry Genasi Warlock from High Rollers: Aerois, and brings back the ruthless Lizardfolk Fighter, Korth, and the legendary Dwarf Fighter/Barbarian, Binwin Bronzebottom. Players have until Monday, June 15th at 12PM Pacific to complete their event unlocks and objectives.

Dungeons & Dragons Nova V'Ger High Rollers Kim Richards

Year 3 Champion: Nova V'Ger

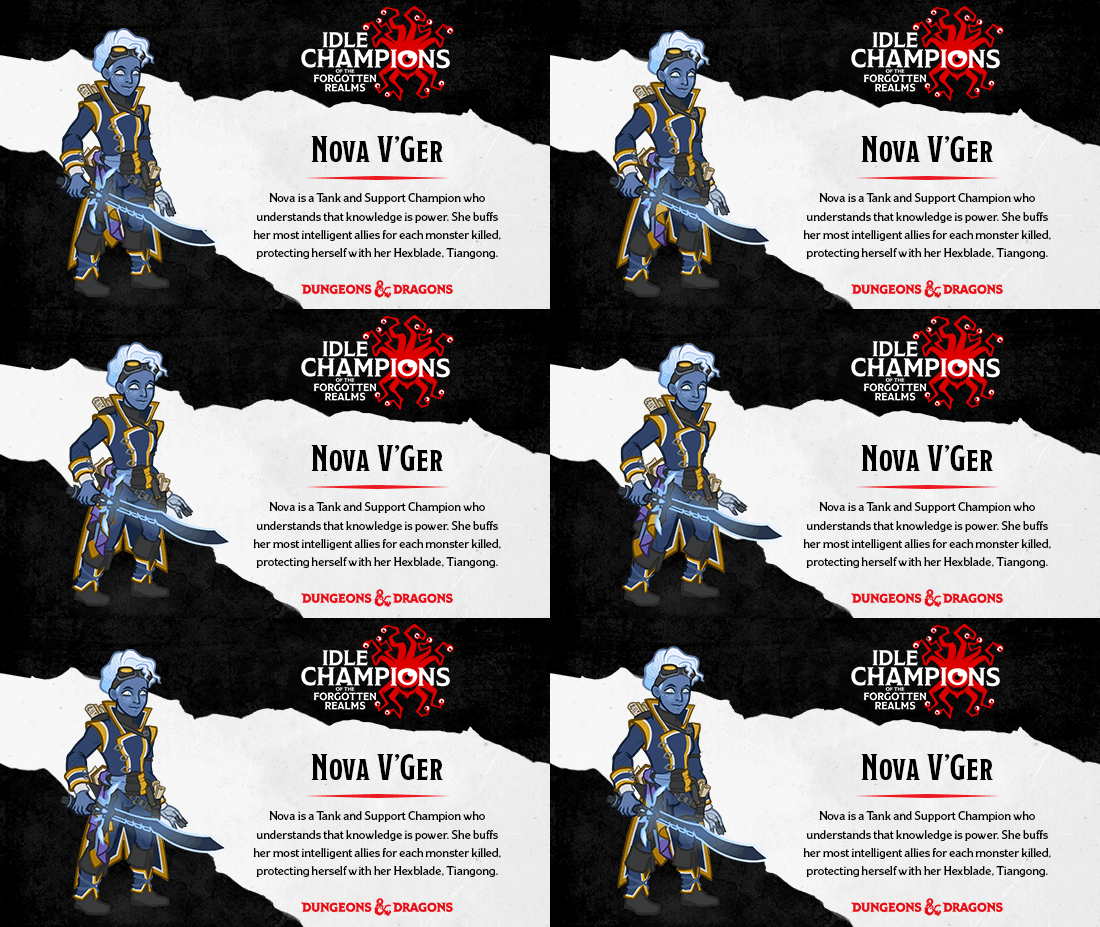
    Nova V'ger has a voracious appetite for knowledge; she needs to know anything and everything about anything and everything. Her magic powers have been gifted to her by a mysterious entity called Tiangong. She dreams of travelling to the stars and discovering the location of the true genasi homeworld.

Nova is a Tank and Support Champion who understands that knowledge is power. She buffs her most intelligent allies for each monster killed, protecting herself with her Hexblade, Tiangong. When you want to add Nova to your formation, you can swap her with Jamilah (Slot 11).

For more information about Nova, check out the Idle Champion Spotlight: Nova dev blog!

Dungeons & Dragons Korth Lizardfolk Fighter Samurai  Xanathar's Guide to Everything

Year 2 Champion: Korth

    Raised as a gladiator in the pit arenas of Kara-Tur, Korth has since traveled the world studying fighting styles and the art of war. Korth is infamous for his skill and efficiency in battle – and for his ruthlessness, as he never spares the lives of his opponents. Those who cross Korth's path do so at their own risk.
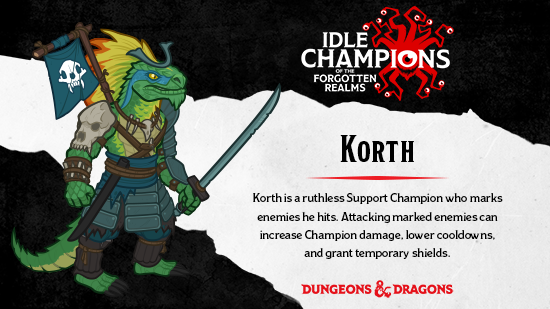
Korth is a Support Champion who marks enemies he hits. Attacking marked enemies can increase Champion damage, lower cooldowns, and grant temporary shields. When you want to add Korth to your formation, you can swap him with Celeste (Slot 2).

For more information about Korth, check out the Idle Champion Spotlight: Korth dev blog!

Dungeons & Dragons Binwin Bronzebottom Scott Kurtz Binwin's Minions AI Acquisitions Incorporated

Year 1 Champion: Binwin Bronzebottom

    Binwin Bronzebottom was a member of a rather infamous adventuring group/company, until he left to spend more time with his family. A grumpy and headstrong dwarf with a penchant for springing traps rather than disarming them, if he's not the first into battle then he's disappointed. There's nary a door, tankard, or acid pit that hasn't felt the wrath of Binwin Bronzebottom at one time or another. These days, when he's not adventuring with the likes of Drizzt and Minsc, Binwin leads a small group of incompetent and eminently replaceable minions through perilous adventures.
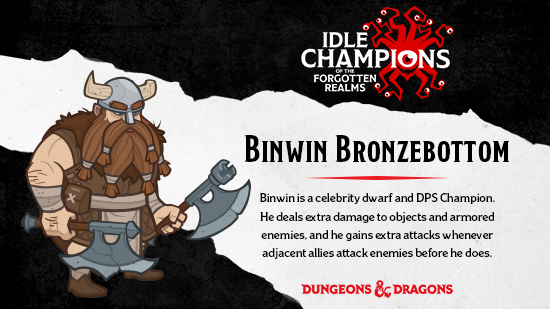
Binwin is a celebrity dwarf and DPS Champion, played by Scott Kurtz on Acquisitions Incorporated and now the leader of Binwin's Minions. Binwin deals extra damage to objects and armored enemies, and he gains extra attacks whenever adjacent allies attack enemies before he does. When you want to add Binwin to your party, you can swap him with Nayeli (Slot 3).

For more information about Binwin, check out the Year One Champion Balance Update dev blog!

Year Three Variants

  • Failed Perception — Only Champions with WIS 14 or lower can be used. Whenever an enemy spawns, there is a 25% chance that it will be an illusory enemy, and won't count towards quest progress or drop gold. When an illusory enemy is killed with a normal attack, the Champion that killed the enemy is stunned for 4 seconds.
    Reach Area 75.

  • Tranced Travellers — Two of the slots in your formation are affected by a magical spell that's causing folks around Luskan to start snoring! The affected slots change every 15 seconds by moving to a random adjacent slot. Heroes in affected slots must concentrate on not falling asleep, so they do not attack and all their formation abilities and ultimate abilities are disabled.
    Reach Area 125.

  • Dolgrim Incursion — Only Champions with INT 14 or higher can be used. Nova begins in the formation and cannot be moved or swapped out. Two Dolgrims appear with each wave of monsters. They drop no gold and do not count towards quest progress. Dolgrims have increased movement speed and their damage is increased by 400%.
    Reach Area 175.

Year Two Variants

  • It's All Going To Be O.K. — Only Champions with an 'o' or 'k' in their name may be used.
    Reach Area 75.

  • Korth's Kobold Kleanup Krew — Korth begins the Adventure in your formation with his Lizardfolk Tactics upgrade unlocked. Armored kobolds attack the formation. These kobolds are invulnerable until marked by Korth.
    Reach Area 125.

  • Durable Dragon — When the Dragon boss in area 50 is defeated, she immediately resurrects with additional armor hits (+20%), attack speed (+25%) and damage (+33%). She gains additional resurrection (and stacking bonuses) for every 50 areas completed (resurrects once in area 50, twice in area 100, three times in area 150, etc.).
    Reach Area 175.

Year One Variants

  • Awaken the Beasts — Beasts move much more quickly and deal far more damage.
    Reach Area 75.

  • Binwin's Minions — Two of Binwin's Minions take up slots in the formation, decreasing the damage of adjacent Champions by 90% with the exception of Binwin, whom they buff by 400%. Binwin's Minions move to different slots in the formation every 20 areas.
    Reach Area 125.

  • Untrusting — The bronze dragon doesn't trust you to return her egg, so she continuously sends her Wyrmlings to keep an eye on you. Four different varieties of Wyrmling spawn at random.
    Reach Area 175.

See the in-game FAQ for more information!

November 13th, 2019
COTLI: New Tier 3 Objectives (Nov 2019) 

Since we are between events and eagerly awaiting Kaine's Dinner of Doom next week, we thought now would be a great time to introduce some new Tier 3 Objectives for Mme. Finklebottom's Revenge and some new Tier 3 11th Objectives!

Looking to learn more? Of course you are! Details about our new Tier 3 Objectives can be found below...

New Tier 3 11th Objectives

Idols Through Time

  • Rewind
    • Complete all previous Tier 3 11th objectives, and all Tier 3 Idols Through Time objectives.
    • A VHS tape floats in the front of the formation.
    • Viewer monsters spawn at random, with a projectile attack.
    • If a ranged monster hits the VHS tape, your area quest progress goes down by 5, unless the quest is already complete.
    • Reach Area 1550.
      REWARD: Faster Free Play Bonus — Increases the Free Play Bonus gained on reset by 100%.

Amusement Park of Doom

  • Queue Up
    • Complete all previous Tier 3 11th objectives, and all Tier 3 Amusement Park of Doom objectives.
    • Monsters drop less Gold.
    • Areas start out more difficult.
    • Royal Crusaders may not be used.
    • Reach Area 850.
      REWARD: Quest Multiplier — Adds a 20% chance for monsters to give double quest progress.

Mme. Finklebottom's Revenge

  • Mountain of Madness
    • Every 15 seconds, a random Crusader becomes infected with paranoia, causing their DPS to zero out.
    • The paranoia also causes the upgrades of Crusaders adjacent to that Crusader to be disabled.
    • Terrifying monsters spawn at random and cannot be killed, except by Firestorm and similar effects.
    • Reach Area 1100.
      REWARD: Extra Mission Idols — Increases Idols gained from Idol missions by 400%.

New Tier 3 Objectives

Mme. Finklebottom's Revenge

  • The Journey of the Ring
    • Four halflings take up spaces in the formation, moving every 50 Areas.
    • A Wizard joins his companions, occupying a slot in the center of the formation.
    • The Wizard buffs both himself and Crusaders adjacent to him based on how many halflings the Crusaders are adjacent to.
    • A Ring Monster spawns randomly, and immediately summons nine Ring Reaper monsters when you kill it.
    • Ring Reapers can count towards quest progress.
    • Reach Area 900.

  • Call in the Eagles
    • Three eagles take up slots in the formation.
    • Bird seed monsters spawn at random.
    • When a bird seed monster is killed, each eagle either buffs or debuffs your formation.
    • Your DPS to monsters is the lowest DPS among all your Crusaders (excluding Clickers.)
      Reach Area 950.

  • Let's Dial In
    • An astronomy arch takes up a slot in the formation, periodically spawning powerful monsters.
    • An alien escort takes the leading spot in the formation, disabling adjacent Crusaders' abilities.
    • Only humans and aliens can be used.
    • Reach Area 950.

  • It's the Climb
    • A country singer takes up a slot in the formation.
    • Your DPS is raised and lowered as she sings.
    • DPS spends more time lowered than Tier 1.
    • Only winged Crusaders can be used.
    • Reach Area 1000.

  • It's Getting Hot in Here
    • A portable volcano takes up a slot in the formation.
    • For every 200 monsters killed, the volcano applies a random buff.
    • The volcano’s heat disables the Formation Abilities of adjacent non-magical Crusaders.
    • Fire falls at random, damaging Crusaders.
    • Volcano now explodes boulders randomly too, which instantly kill a Crusader.
    • Only Projectile Crusaders, and Crusaders with guns, can be used.
    • Reach Area 1000.

  • Vertical Limits
    • Every monster killed causes a random Crusader to get closer to freezing.
    • When a Crusader is frozen, their DPS is 0 and their gear and formation abilities are disabled.
    • Crusaders are chilled even more quickly than on previous tiers.
    • Reach Area 1000.

  • Dead Snow
    • Zombie monsters spawn at random.
    • After 10 zombies are slain, a tougher zombie spawns which can only be damaged by clicks.
    • Zombie Winter, Roboqueen and Dragons get a bonus (100% buff for all FAs) for being in the formation.
    • The stronger zombie spawns after only 5 lesser zombies.
    • All non-boss area quests are changed to kill the Tough Zombie monster.
    • Reach Area 1050.

August 22nd, 2019
COTLI: Dr. Evil's Summer Sabotage 4 

OH NO! DR. EVIL IS AT IT AGAIN!

Wait... didn't this happen last year? And the year before? And the year before that?

We should have seen this coming! Luckily, it seems at least one person was prepared for Dr. Evil's inevitable return: Euodia, the Fencer is here to help the Crusaders foil Dr. Evil's plans once again!

Dr. Evil's Summer Sabotage 4 introduces Euodia, the Fencer and brings back Veronica, the Android Archer, Bubba, the Swimming Orc, The Gold Hound, Milgrid the Mining Mage, and Dr. Evil, PhD. The adventure ends on Tuesday, September 3rd, 2019 at 12:00PM PDT!

New Tier 4 Crusader: Euodia, the Fencer

Euodia is deceptively fast for a minotaur, able to increase the speed of monster spawns through First Blood and Lightning Precision and even increase the speed of quest item drops with Sense of Direction. She can even improve First Blood with Fancy Footwork as Orcs, Dwarves, and Elves join the formation! Euodia improves DPS and Global DPS through Cradle the Bird and Toe Pokes.

If you want to get as far as possible as quickly as possible, Euodia, the Fencer is the Crusader for you!

Crusaders Return

If you haven't collected them already, you can unlock previous Tier 1, Tier 2, and Tier 3 Crusaders by completing their respective objectives. Veronica, the Android Archer, Bubba, the Swimming Orc, The Gold Hound, Milgrid the Mining Mage, and Dr. Evil, PhD are all once again available to unlock!

New Tier 4 Objectives

  • Recruit Euodia, the Fencer | Euodia takes up a slot in the formation. Non-DPS Crusaders who aren't adjacent to a DPS Crusader will be disabled.
    Reach area 600.

  • A Tankless Task | Only Taskmasters and Abilities can do damage. No tank Crusaders allowed.
    Reach area 700.

  • Relay Race | Only 6 consecutive bench slots are available at a time, starting with the first 6 and working up to the final 6 as you approach area 750.
    Reach area 750.

  • Pair Up! | Each Crusader is randomly paired up with a partner. Crusaders have their DPS and formation abilities disabled unless they are adjacent to their partner.
    Reach area 800.

  • Amateur Volleyball | The middle column of the formation is removed. Crusaders now toss a volleyball between each 'side' of the formation. Crusaders hold on to the volleyball for 10 seconds, violating the rules of the game and disabling their abilities.
    Reach area 850.


Help! Where’s the Loot?

Equipment for event Crusaders can be found in Silver and Jeweled Crusader Games Chests, which you can earn from objectives and the free play or buy in the shop. Each non-recruitment objective will drop a chest for its given tier of Crusaders, and free play will drop all-tier chests. Gear for Tier 2, Tier 3, and Tier 4 Crusaders will only appear in all-tier chests once you've unlocked the respective Crusaders. You can select the tier of chest you buy in the shop.

You'll have until Tuesday, September 3rd, 2019 at 12:00PM PDT to complete Dr. Evil's Summer Sabotage 4!
July 24th, 2019
COTLI: Mme. Finklebottom's Revenge, Tier 2! 

At last, Mme. Finklebottom's Revenge joins the rest of the campaign pack, with a slew of new objectives including the tier 1 and 2 11th-slot objectives. Beat them to unlock Arenvarr the Beheaded, and Bonus Idols for the campaign.

This update today sees the addition of eleven objectives for you to tackle on our most recent campaign Mme. Finklebottom's Revenge!

Remaining Tier 1 Objectives

  • Vertical Limits - Reach area 700 while avoiding frostbite.

  • Dead Snow - Reach area 750 while looking out for zombies, with a unique formation.

  • Everest - Reach area 800, if you can still breathe. This Tier 1 11th objective unlocks the Crusader Arenvarr, the Beheaded. Arenvarr's gear can be found in normal Silver and Jeweled chests.

Tier 2 Objectives

  • The Journey of the Ring The journey continues on to area 800, and a Wizard has joined his halfling-friends in your party.

  • Call in the Eagles! Suffer your avian companions for another 200 areas, to reach area 850.

  • Let's Dial In Reach area 850 not only with the pesky Astronomy Arch, but also with an alien influencer who disables the DPS of adjacent Crusaders.

  • It's the Climb Climb to area 900 this time, with your DPS spending more time at 0.

  • It's Getting Hot in Here The volcano is stepping up its game, as you escort it to area 900. Non-magical Crusaders adjacent to the volcano are disabled, and its starting to rain fire.

  • Vertical Limits - Reach area 900 while avoiding frostbite that builds up quicker than in Tier 1.

  • Dead Snow - Reach area 950 while avoiding the faster onslaught of zombies. Never fear though, the deathly chill empowers Zombie Winter, RoboQueen, and all Dragons, doubling the effects of their formation abilities.

  • Just So - Reach area 1000 with everything right where it ought to be. This Tier 2 11th objective unlocks Bonus Boss Idol drops for the Mme. Finklebottom's Revenge campaign and buffs all Bonus Boss Idol drops for all campaigns.


Enjoy!
June 12th, 2019
Idle Champions: Dragondown 2 
Posted in Idle Champions.

The City of Sails, Luskan, needs your help! While celebrating their annual Summer Solstice festivities, the Luskans have somehow drawn the ire of a powerful Bronze Dragon and their kin. It's up to you to save them...

Dragondown 2 introduces Korth, a ruthless Lizardfolk Samurai, and brings back Binwin Bronzebottom, legendary Dwarven Fighter and Barbarian. Players will have until Monday, June 24th, 2019 at 12:00pm PDT, to unlock them!

New Champion: Korth

    Raised as a gladiator in the pit arenas of Kara-Tur, Korth has since traveled the world studying fighting styles and the art of war. Korth is infamous for his skill and efficiency in battle – and for his ruthlessness, as he never spares the lives of his opponents. Those who cross Korth's path do so at their own risk.
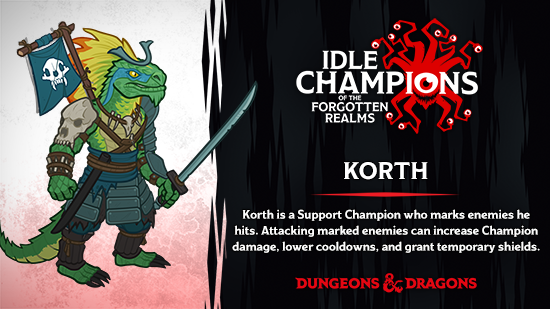
Korth is a Support Champion who marks enemies he hits. Attacking marked enemies can increase Champion damage, lower cooldowns, and grant temporary shields. When you want to add Korth to your formation, you can swap him with Celeste (Slot 2).

For more information about our latest Champion, check out the Idle Champion Spotlight: Korth dev blog!

Returning Champion: Binwin Bronzebottom

    Binwin Bronzebottom was a member of a rather infamous adventuring group/company, until he left to spend more time with his family. A grumpy and headstrong dwarf with a penchant for springing traps rather than disarming them, if he's not the first into battle then he's disappointed. There's nary a door, tankard, or acid pit that hasn't felt the wrath of Binwin Bronzebottom at one time or another. These days, when he's not adventuring with the likes of Drizzt and Minsc, Binwin leads a small group of incompetent and eminently replaceable minions through perilous adventures.
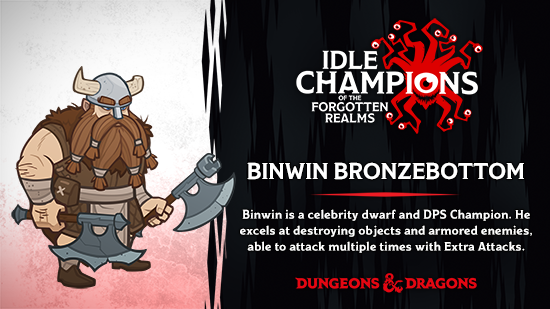
Binwin is a celebrity dwarf and DPS Champion, played by Scott Kurtz on Acquisitions Incorporated and now the leader of Binwin's Minions. He excels at destroying objects and armored enemies, able to attack multiple times through his Extra Attacks ability. When you want to add Binwin to your party, you can swap him with Nayeli (Slot 3).

Year Two Variants

  • It's All Going To Be O.K. — Only Champions with an 'o' or 'k' in their name may be used.

  • Korth's Kobold Kleanup Krew — Korth begins the Adventure in your formation with his Lizardfolk Tactics upgrade unlocked. Armored kobolds attack the formation. These kobolds are invulnerable until marked by Korth.

  • Durable Dragon — When the Dragon boss in area 50 is defeated, she immediately resurrects with additional armor hits (+20%), attack speed (+25%) and damage (+33%). She gains additional resurrection (and stacking bonuses) for every 50 areas completed (resurrects once in area 50, twice in area 100, three times in area 150, etc.).

Year One Variants

  • Awaken the Beasts — Beasts move much more quickly and deal far more damage.

  • Binwin's Minions — Two of Binwin's Minions take up slots in the formation, decreasing the damage of adjacent Champions by 90% with the exception of Binwin, whom they buff by 400%. Binwin's Minions move to different slots in the formation every 20 areas.

  • Untrusting — The bronze dragon doesn't trust you to return her egg, so she continuously sends her Wyrmlings to keep an eye on you. Four different varieties of Wyrmling spawn at random.

See the in-game FAQ for more information!