


The focus of Season 6's redesign was to modernize these five older Champions and add new high-DEX formation options to the game. DEX is one of the highest average stat scores in the game, so there are plenty of other highly dexterous Champions to synergize in your formation alongside these five.
We're also trying something new with Season 6: we have removed daily quests and shortened the overall length of the season, redistributing Daily Quest XP to the Seasonal and Milestone Quests. This should allow you more flexibility in when and how you go after your season progress, while still giving you access to a similar total amount of experience.
The changes outlined below are live as of 12:00PM PT on Wednesday, November 8th, when Season 6: Elemental Rebirth kicks off!
Table of Contents
Champion Overview
Zorbu (Seat 12)
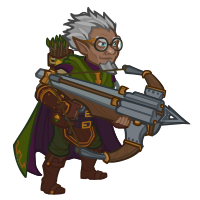 Zorbu received the most votes out of any Champion in the season 3 survey, but his kit was actually already pretty solid. Zorbu has begun seeing a trauma counselor regarding his unfortunate past, and thus several of his abilities have received name changes as his rage has subsided. With his kit already being quite powerful, our main goal with Zorbu this season was to ensure you could build the rest of the formation around him, and give him some interesting positional options in high DEX formations.
Zorbu's is a hunter first and foremost. His first ability, Know Your Enemy, gains stacks as you kill certain types of enemies. These stacks persist between adventure resets, so the more you use Zorbu, the higher they get, increasing his power in a way that is unlike almost every other Champion in the game. Zorbu deals additional damage against specific types of enemies, but also deals more against all enemies thanks to Focused Fury, which increases his damage based on the total number of Know Your Enemy stacks he has. Zorbu's main support ability is Hunter's Pack, which increases the damage of adjacent Champions with a high DEX score. Zorbu himself also benefits from this buff via his new Expert Hunter ability.
Specializations:
Zorbu's specializations offer a choice between farming more stacks of Know Your Enemy, or boosting Zorbu's damage and support to a massive degree. Lead the Pack buffs Hunter's Pack based on your Focused Fury bonus, while Hunting Partners causes Know Your Enemy to stack up faster if Zorbu is adjacent to more high DEX Champions.
Using Zorbu:
Whether you're using Zorbu as a DPS or a Support Champion, you're going to want to position him adjacent to as many high DEX Champions as you can, which is made easier thanks to the season reward feat Wolf Pack, which actually increases the DEX score of adjacent Champions, meaning you can use him with some Champions that wouldn't normally qualify for Hunter's Pack.
Warden (Seat 11)
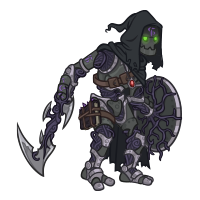 Warden was our next highest voted Champion, and for good reason. This bad-ass Warforged Hexblade Warlock was an exceptionally popular DPS Champion when they debuted in Simril Year 2, but their simple kit had fallen by the wayside in recent years and they were in desperate need of a rework. Their new kit includes an army of accursed spectres that dart around the field providing a visual symphony worthy of this epic Champion.
Hex is Warden's main dps and support ability. This debuff increases the damage that enemies Warden attacks take from all sources. Initially, Warden can only Hex each enemy once, but level them up enough and you'll unlock Relentless Hex, which allows Hex to stack up to four times on each enemy. Warden's secondary ability is Accursed Specter, which causes a specter to appear whenever an enemy afflicted by Hex is killed. These specters cause nearby enemies to take even more damage, making Warden the undisputed authority of debuff-based damage. Specter Rush allows the specters to move around the battlefield, rushing towards targets that Warden attacks and then slowly drifting past them to increase the damage they take from allied Champions. Master of Hexes allows Hex to spread all by itself when an enemy is killed near an Accursed Specter. Finally, Cloak of Flies causes Warden to do area damage when they attack, based on the highest number of Hexed enemies that have existed in the area.
Specializations:
Warden's specializations all increase the maximum number of Accursed Specters that can be active at once. The Dark Hunger increases it based on the number of Evil Champions in the formation. Shadows In The Night instead increases it based on the number of high DEX Champions in the formation. Finally, if neither of those tickle your fancy, Charm of the Fallen increases the max specter count based on the number of Champions with Charisma as their highest stat score.
Using Warden:
As one of the few Champions without any positional formation abilities, Warden has a lot of flexibility on where they are used. When using them as a DPS, position them so that the rest of your support Champions buff them, and when using them as a Support, position them wherever you have an empty slot that needs filling. Regardless of how you use them, stack your formation with Champions that meet the requirements of your chosen specialization to really benefit from having plenty of Accursed Specters on the field at once.
Sisaspia (Seat 1)
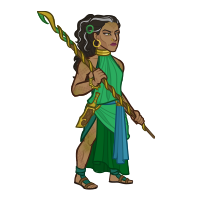 Sisaspia has always been one of our favorite Champions, and we were excited to see her in the top half of the votes. She has received several desperately needed quality of life buffs that should bring her power level up to a well-deserved "solid". We did have to fudge her ability scores just a little bit to make her fit in with the high DEX crowd, but, I mean, she's part snake. It makes sense.
Sisaspia's main mechanic is her Halo of Spores, which swirl around her until enemies approach the formation. She then psychically blasts her spores into enemies, causing them to take more damage over time when hit. Normal enemies can be afflicted by several spores at once, while bosses can have even more infesting their bodies. Sisaspia's positional buff, Symbiotic Infection, buffs Champions near her based on the number of spores she has infected her enemies with in the current area, and Symbiotic Healing heals damaged Champions using the same metric. Her final ability, Dance of the Spores, increases Sisaspia's spore reserve and potentially increases the range of her Halo of Spores ability based on the average DEX score of all Champions in the formation. The higher, the better.
Specializations:
Sisaspia's specializations are useful in a variety of different situations. The most straightforward is Simple Infection, which increases the effect of Symbiotic Infection. Spreading Spores increases the rate at which Halo of Spores creates new spores, and increases the maximum. Finally, Fungal Body greatly increases Symbiotic Infection and Healing, but only after Sisaspia has blasted out a certain number of spores in the current area.
Using Sisaspia:
Position Sisaspia within 2 slots of your main damage dealer to provide excellent support via Symbiotic Infection. Make sure she's also within 2 slots of your tanks if you'd like her to help keep them alive, too. Since she'll heal everyone nearby, she's useful near the center of your formation if you're in an adventure or variant where everyone could take damage at any time.
Nrakk (Seat 8)
 Nrakk was a special Champion with some unique interactions with some abilities in the game. Unfortunately, some of these unique interactions needed to go in order to simplify both our job (balancing the game) and yours (finding weird ways that Nrakk could break the game). We have tried to compensate for this by updating Nrakk's kit and also giving him the most complicated ultimate ability in the world. We've also removed the dps role from Nrakk's kit, so he's purely a support Champion now.
Nrakk's Way of the Kensai ability increases the damage of Champions ahead of and behind him. Nrakk can earn Ki Points by using his ultimate ability, Ki Blast. Ki Blast initially grants a few Ki Points and shoots a bolt of energy at a random enemy, but if you reactivate it at the right time it can fire off again and earn you even more Ki Points (and damage). Repeat this process to stack up as many Ki Points as possible, which you'll want to do because Ki Master increases Way of the Kensai based on the highest number of Ki Points you've had at once on the current adventure. Stunning Strike consumes a Ki Point to stun and increases the damage taken by enemies that Nrakk hits, while Kensai Cleave causes every 3rd attack to do a wide cleave. Perfect Self causes Nrakk's ultimate to cool down faster if he's out of Ki Points when he attacks enemies.
Specializations:
Nrakk's two specialization choices are super unique. Githzerai Focus increases the positional formation abilities of adjacent Champions with a high WIS score, while Githzerai Agility does the same for adjacent Champions with a high DEX score.
Using Nrakk:
You're going to want to plop Nrakk in the column directly in front of or behind your formation's main damage dealer. Ideally you're also going to want Nrakk to be adjacent to support Champions with positional formation abilities and stat scores that exceed the requirements of his chosen specialization. The exact right positioning and Champions may be challenging to discover, but when you do it will be worth it!
Korth (Seat 2)
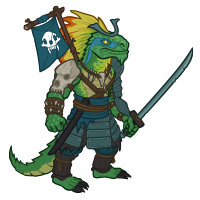 Korth was the most challenging Champion of the season for us to rework, as we had inadvertently duplicated many of his abilities on his powerful seat-mate Widdle. Making him stand out was a challenge, but the utility of his updated specialization should make him a good choice for augmenting your high DEX formations with some of the game's less agile Champions.
Korth's Rapid Training increases the damage and attack speed of all high DEX Champions in the formation, regardless of his positioning relative to them. Lizardfolk Tactics causes him to mark enemies he attacks, increasing the damage they take from all attacks. Whenever a Champion attacks an enemy that Korth has marked, they gain a temporary hitpoint shield thanks to Fighting Spirit, with tanks getting an even bigger shield. Calculated increases the effect of Rapid Training based on the formation's total DEX score, and Group Tactic further buffs the ability based on the number of Marked enemies in the current area. Finally, Strength Before Death causes Korth to make an ultimate attack against enemies who attempt to do a killing blow on him or his allies. This can only occur a few times before it goes on cooldown, but could be the difference between success and failure in a tough area.
Specializations:
Korth's Samurai Training specializations are totally unique and provide a level of customization in your formations that you've never seen before. Depending on the spec you choose, Korth will increase the DEX score of the affected Champions to 16. You can target the two slots directly in front of, directly behind, or directly above and below Korth.
Using Korth
Since Korth's buffs are global, his positioning in your formation should be entirely focused on who you want to affect with his Samurai Training specialization. Place two lower DEX Champions in the targeted slots in order to integrate them into your high DEX formation and potentially make them eligible for other Champions' DEX-based buffs.
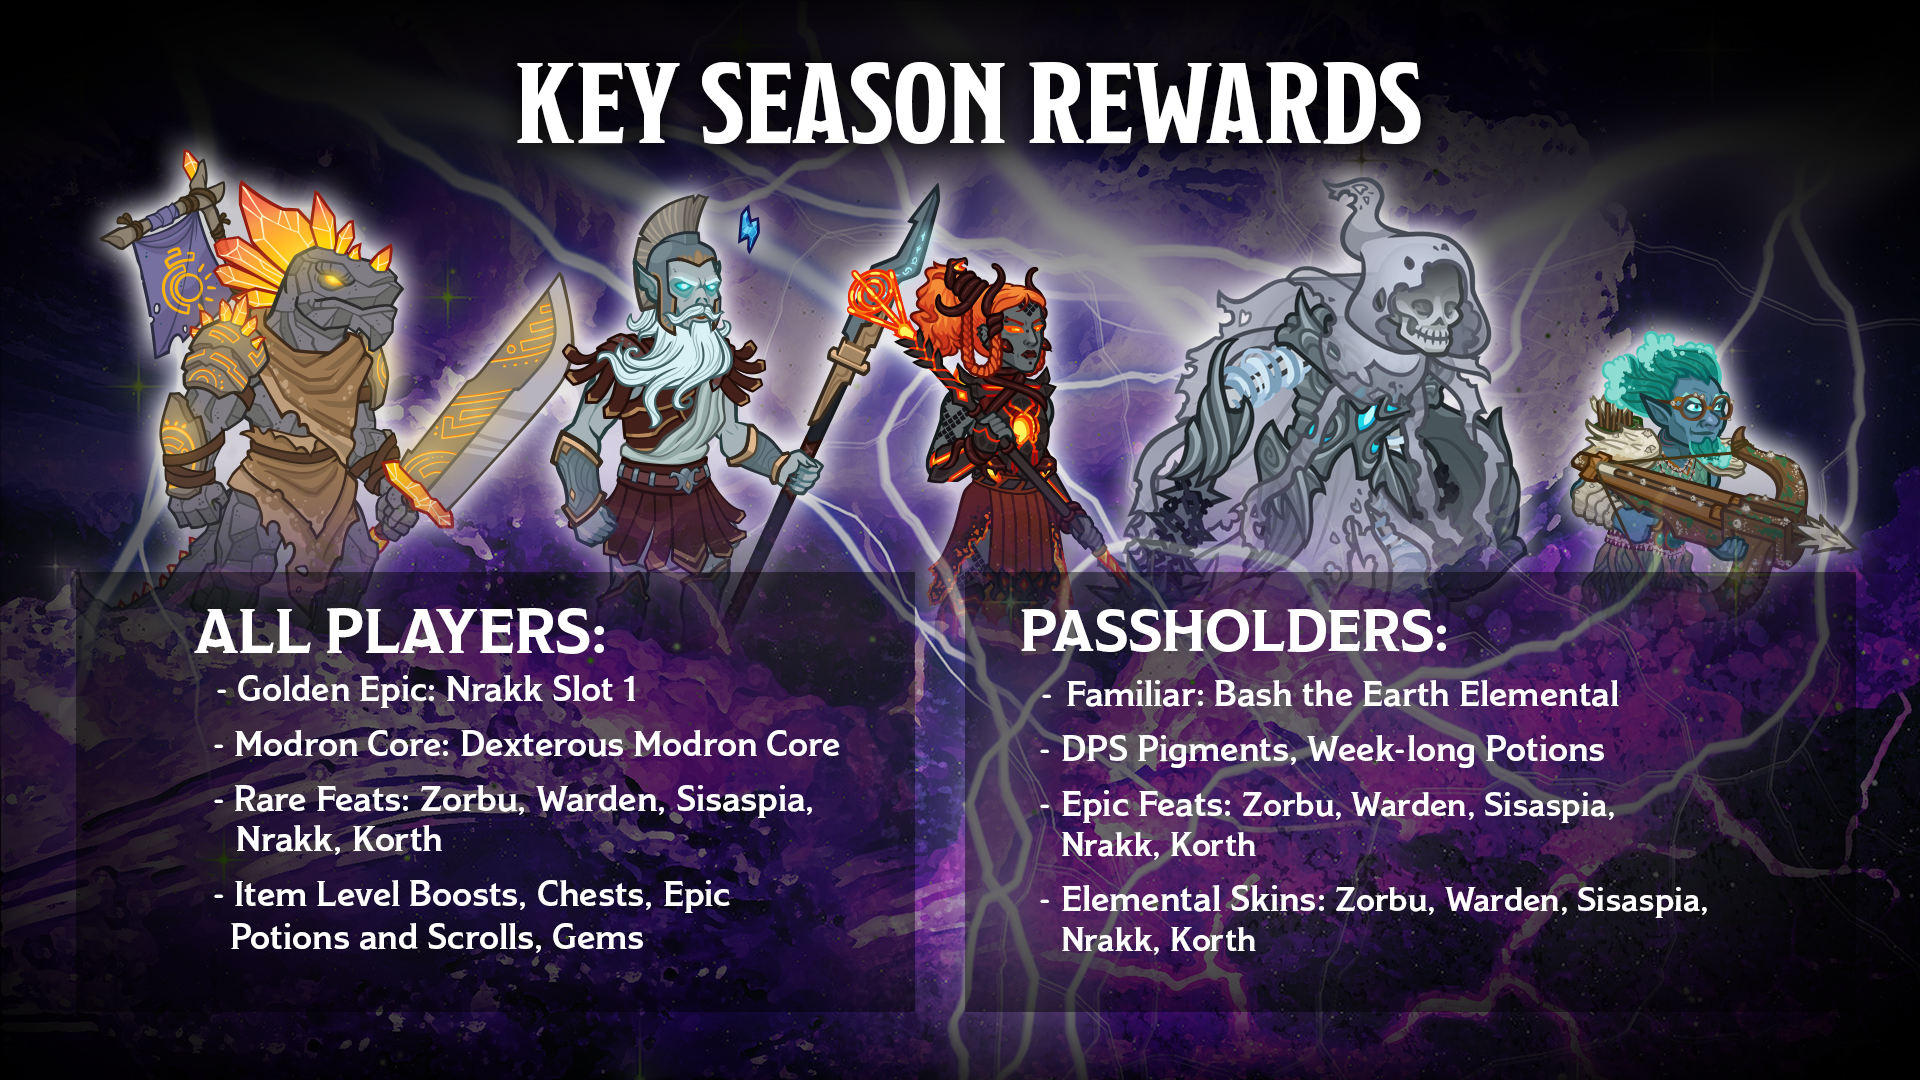
Key Season Rewards
As with last season, the marquee rewards are at level 60. After that, you begin to earn Bonus tokens for every level (two tokens per level for Season Pass purchasers). Each token can be redeemed for one of the 15 unique bonus rewards.
Once a reward has been earned, it cannot be earned again until each type of reward has been earned. Once all rewards are earned, your odds reset. Your odds of a specific type of reward when none have been earned are approximately as follows:
Champion iLevels: 33%
Gems: 13%
Modron Component Chest: 13%
Season Chest: 13%
Blacksmithing Contracts: 6.5%
Bounty Contracts: 6.5%
Supply Chest: 6.5%
Support Pigment: 6.5%
This season includes a new Dexterous Modron Core, a Golden Epic for Nrakk, a new familiar: Bash the Earth Elemental, Epic and Rare feats for all the Season Champions, and exclusive skins for those Champions! It also makes Marvelous DPS Pigments available for the first time since Season 4! Check out the Rewards track in-game for more detail.
Rewards:
Available to All Players
- Golden Epic: Nrakk Slot 1
- Modron Core: Dexterous Modron Core
- Rare Feats: Zorbu, Warden, Sisaspia, Nrakk, Korth
- Item Level Boosts
- Chests
- Epic Potions and Scrolls
- Gems
Available to Passholders
- Familiar: Bash the Earth Elemental
- DPS Pigments
- Week-long Potions
- Epic Feats: Zorbu, Warden, Sisaspia, Nrakk, Korth
- Elemental Skins: Zorbu, Warden, Sisaspia, Nrakk, Korth

Keywords and Key Abilities
Throughout the season, various quests may reference certain keywords and abilities. Here is a quick reminder on some of those!
BUD-setting: BUD stands for Base Ultimate Damage. Your 'BUD' is based on the DPS of the highest hit that any Champion has recently achieved against a single enemy. Bud-setting Champion, means the Champion who has most recently done the most damage.
- On PC UI, this is visible by mousing over the lightning bolt banner to the left of your Ultimate Attack buttons.
- On Console UI, this is visible by looking to the right of your ultimate bar, on the graphic labeled with 'Ult DPS'.
Event Adventures: Event Adventures are only available in two ways: When the corresponding event is active, or when a time gate for a Champion that was originally available in that event is opened. Event Adventures are home to many unique bosses and creatures, however, some of them can be found outside of their original events in permanent adventures.
Patron Challenges: The Patron system allows you to re-play adventures and variants with additional restrictions, resulting in influence and currency that you can spend in a Patron's given shop. Once you have unlocked a Patron, they will provide you with ten challenges that refresh every Monday at Noon Pacific Time.
- On PC UI, Patrons are accessible through a button on the upper left UI.
- On Console UI, Patrons are accessible in the UI buttons above the Champion seats.
Positional Formation Abilities: Positional Formation Abilities are abilities that trigger based on where a target is in the formation.
Time Gate Adventures: A Time Gate allows you to unlock Champions from previous events you may have missed and/or gear them up for free. You need 6 Time Gate Pieces to open a Time Gate for a Champion, though they open naturally every 2-3 weekends.
- On PC UI, Time Gates are accessible through a button on the upper left UI.
- On Console UI, Time Gates are accessible in the UI buttons above the Champion seats.

Key Enemies
Throughout the season, various quests may reference certain types of enemies. Here is a quick reminder on where to find some of those!
Abominable Yeti: The Abominable Yeti is the area 50 boss in any of the Simril event adventures, but if that event has ended you can find them as the first boss in the first adventure of the Icewind Dale campaign, The Giant's Bane Tavern. They can be found in several other adventures as well.
Beasts: Beast monsters can be encountered in most adventures. If you are looking for a good target to encounter beasts, try The Cursed Farmer - the first (non-tutorial) adventure in the Grand Tour of the Sword Coast campaign.
Demon Boss: Demon bosses are common throughout the Forgotten Realms, but the easiest one to farm can be found in The Cursed Farmer adventure in the Grand Tour of the Sword Coast campaign. Look for the Gnoll King in area 20.
Demons: Demon enemies come in many freaky forms, however if you're early in the game you can find some in the The Mad Wizard adventure in the Grand Tour of the Sword Coast campaign.
Fey: Fey are fairly common in the Witchlight Carnival campaign, but if you haven't unlocked it yet you can find several groups of Satyrs early on in the Grand Tour of the Sword Coast campaign in the Beast Intentions and The Mad Wizard adventures.
Giant Bosses: You can find an Ice Troll ripe for farming in The Giant's Bane Tavern adventure in the Icewind Dale campaign (the very first adventure of the campaign). If that doesn't float your boat, or if your boat is frozen in the lake, there are several other targets scattered throughout the Forgotten Realms.
Humanoids: Humanoid monsters can be encountered in many adventures. If you are looking for a good target to encounter humanoids, try A Mysterious Summons - the first adventure in the Waterdeep: Dragon Heist campaign.
Mad Cultist of Cyric: The Mad Cultist of Cyric can only be found in the Feast of the Moon event adventure. If you missed their event, you can open a time gate for a Champion from Feast of the Moon, like Gromma, Sentry, or Jang Sao, and find this boss in any of their adventures.
Overambitious City Guard: The Overambitious City Guard is a recurring boss. They can be found in the Merry Map Misadventure adventure in the Wintershield event, or if that event is not available then you should be able to find them in the first adventure of the Waterdeep: Dragon Height campaign.
Plant Bosses: Plant bosses are rare, but not impossible to find. If you're looking for easy prey, you can find a Shambling Mound in The Mad Wizard adventure early on in the Grand Tour of the Sword Coast campaign, as well as in many other adventures throughout the game.
Resurrected Hero of the Vale: If you are looking for a good target to encounter the Resurrected Hero of the Vale, try the Highharvestide adventure: The Bandit's Harvest or the Feast of the Moon adventure: The Crypt of Legends. You can access The Bandit's Harvest by opening a Time Gate to Stoki, Farideh, Pwent, Torogar, D'hani, or Egbert. You can access The Crypt of Legends by opening a Time Gate to Gromma, Sentry, Penelope, Widdle, or Virgil.
Segmented Health: Bosses with segmented health are available on many different adventures. Bosses with hit-based or armor-based health will count towards this quest. The Tyrannosaurus Zombie on area 50 of Running of the Saurs in the Tomb of Annihilation campaign is a great early-game example of a segmented health boss!
Wearer of Purple: The Wearer of Purple is a boss from the Wintershield event, so you can easily find them during that event or in a Wintershield time gate. They also appear in the 12th adventure of the Waterdeep: Dragon Height campaign: Waterdeep Under Siege.
Winter Wolf Alpha: You can find Winter Wolf Alpha bosses in many adventures, especially several in the Icewind Dale campaign (such as the very first adventure, The Giant's Bane Tavern). However, the easiest place to find them is in any Simril event adventure (in area 15).
Undead: Undead monsters are available in many different adventures. If you are looking for a good target to encounter undead, you can find Zombies in Terror in the Dark - the fourth adventure in the Grand Tour of the Sword Coast Campaign.
Warden was our next highest voted Champion, and for good reason. This bad-ass Warforged Hexblade Warlock was an exceptionally popular DPS Champion when they debuted in Simril Year 2, but their simple kit had fallen by the wayside in recent years and they were in desperate need of a rework. Their new kit includes an army of accursed spectres that dart around the field providing a visual symphony worthy of this epic Champion.
Sisaspia has always been one of our favorite Champions, and we were excited to see her in the top half of the votes. She has received several desperately needed quality of life buffs that should bring her power level up to a well-deserved "solid". We did have to fudge her ability scores just a little bit to make her fit in with the high DEX crowd, but, I mean, she's part snake. It makes sense.
Nrakk was a special Champion with some unique interactions with some abilities in the game. Unfortunately, some of these unique interactions needed to go in order to simplify both our job (balancing the game) and yours (finding weird ways that Nrakk could break the game). We have tried to compensate for this by updating Nrakk's kit and also giving him the most complicated ultimate ability in the world. We've also removed the dps role from Nrakk's kit, so he's purely a support Champion now.
Korth was the most challenging Champion of the season for us to rework, as we had inadvertently duplicated many of his abilities on his powerful seat-mate Widdle. Making him stand out was a challenge, but the utility of his updated specialization should make him a good choice for augmenting your high DEX formations with some of the game's less agile Champions.
Once a reward has been earned, it cannot be earned again until each type of reward has been earned. Once all rewards are earned, your odds reset. Your odds of a specific type of reward when none have been earned are approximately as follows:
This season includes a new Dexterous Modron Core, a Golden Epic for Nrakk, a new familiar: Bash the Earth Elemental, Epic and Rare feats for all the Season Champions, and exclusive skins for those Champions! It also makes Marvelous DPS Pigments available for the first time since Season 4! Check out the Rewards track in-game for more detail.
Rewards:
Available to All Players
- Golden Epic: Nrakk Slot 1
- Modron Core: Dexterous Modron Core
- Rare Feats: Zorbu, Warden, Sisaspia, Nrakk, Korth
- Item Level Boosts
- Chests
- Epic Potions and Scrolls
- Gems
Available to Passholders
- Familiar: Bash the Earth Elemental
- DPS Pigments
- Week-long Potions
- Epic Feats: Zorbu, Warden, Sisaspia, Nrakk, Korth
- Elemental Skins: Zorbu, Warden, Sisaspia, Nrakk, Korth
Keywords and Key Abilities
BUD-setting: BUD stands for Base Ultimate Damage. Your 'BUD' is based on the DPS of the highest hit that any Champion has recently achieved against a single enemy. Bud-setting Champion, means the Champion who has most recently done the most damage.
- On PC UI, this is visible by mousing over the lightning bolt banner to the left of your Ultimate Attack buttons.
- On Console UI, this is visible by looking to the right of your ultimate bar, on the graphic labeled with 'Ult DPS'.
Patron Challenges: The Patron system allows you to re-play adventures and variants with additional restrictions, resulting in influence and currency that you can spend in a Patron's given shop. Once you have unlocked a Patron, they will provide you with ten challenges that refresh every Monday at Noon Pacific Time.
- On PC UI, Patrons are accessible through a button on the upper left UI.
- On Console UI, Patrons are accessible in the UI buttons above the Champion seats.
Time Gate Adventures: A Time Gate allows you to unlock Champions from previous events you may have missed and/or gear them up for free. You need 6 Time Gate Pieces to open a Time Gate for a Champion, though they open naturally every 2-3 weekends.
- On PC UI, Time Gates are accessible through a button on the upper left UI.
- On Console UI, Time Gates are accessible in the UI buttons above the Champion seats.
Key Enemies
Abominable Yeti: The Abominable Yeti is the area 50 boss in any of the Simril event adventures, but if that event has ended you can find them as the first boss in the first adventure of the Icewind Dale campaign, The Giant's Bane Tavern. They can be found in several other adventures as well.
Beasts: Beast monsters can be encountered in most adventures. If you are looking for a good target to encounter beasts, try The Cursed Farmer - the first (non-tutorial) adventure in the Grand Tour of the Sword Coast campaign.
Demon Boss: Demon bosses are common throughout the Forgotten Realms, but the easiest one to farm can be found in The Cursed Farmer adventure in the Grand Tour of the Sword Coast campaign. Look for the Gnoll King in area 20.
Demons: Demon enemies come in many freaky forms, however if you're early in the game you can find some in the The Mad Wizard adventure in the Grand Tour of the Sword Coast campaign.
Fey: Fey are fairly common in the Witchlight Carnival campaign, but if you haven't unlocked it yet you can find several groups of Satyrs early on in the Grand Tour of the Sword Coast campaign in the Beast Intentions and The Mad Wizard adventures.
Giant Bosses: You can find an Ice Troll ripe for farming in The Giant's Bane Tavern adventure in the Icewind Dale campaign (the very first adventure of the campaign). If that doesn't float your boat, or if your boat is frozen in the lake, there are several other targets scattered throughout the Forgotten Realms.
Humanoids: Humanoid monsters can be encountered in many adventures. If you are looking for a good target to encounter humanoids, try A Mysterious Summons - the first adventure in the Waterdeep: Dragon Heist campaign.
Mad Cultist of Cyric: The Mad Cultist of Cyric can only be found in the Feast of the Moon event adventure. If you missed their event, you can open a time gate for a Champion from Feast of the Moon, like Gromma, Sentry, or Jang Sao, and find this boss in any of their adventures.
Overambitious City Guard: The Overambitious City Guard is a recurring boss. They can be found in the Merry Map Misadventure adventure in the Wintershield event, or if that event is not available then you should be able to find them in the first adventure of the Waterdeep: Dragon Height campaign.
Plant Bosses: Plant bosses are rare, but not impossible to find. If you're looking for easy prey, you can find a Shambling Mound in The Mad Wizard adventure early on in the Grand Tour of the Sword Coast campaign, as well as in many other adventures throughout the game.
Resurrected Hero of the Vale: If you are looking for a good target to encounter the Resurrected Hero of the Vale, try the Highharvestide adventure: The Bandit's Harvest or the Feast of the Moon adventure: The Crypt of Legends. You can access The Bandit's Harvest by opening a Time Gate to Stoki, Farideh, Pwent, Torogar, D'hani, or Egbert. You can access The Crypt of Legends by opening a Time Gate to Gromma, Sentry, Penelope, Widdle, or Virgil.
Segmented Health: Bosses with segmented health are available on many different adventures. Bosses with hit-based or armor-based health will count towards this quest. The Tyrannosaurus Zombie on area 50 of Running of the Saurs in the Tomb of Annihilation campaign is a great early-game example of a segmented health boss!
Wearer of Purple: The Wearer of Purple is a boss from the Wintershield event, so you can easily find them during that event or in a Wintershield time gate. They also appear in the 12th adventure of the Waterdeep: Dragon Height campaign: Waterdeep Under Siege.
Winter Wolf Alpha: You can find Winter Wolf Alpha bosses in many adventures, especially several in the Icewind Dale campaign (such as the very first adventure, The Giant's Bane Tavern). However, the easiest place to find them is in any Simril event adventure (in area 15).
Undead: Undead monsters are available in many different adventures. If you are looking for a good target to encounter undead, you can find Zombies in Terror in the Dark - the fourth adventure in the Grand Tour of the Sword Coast Campaign.