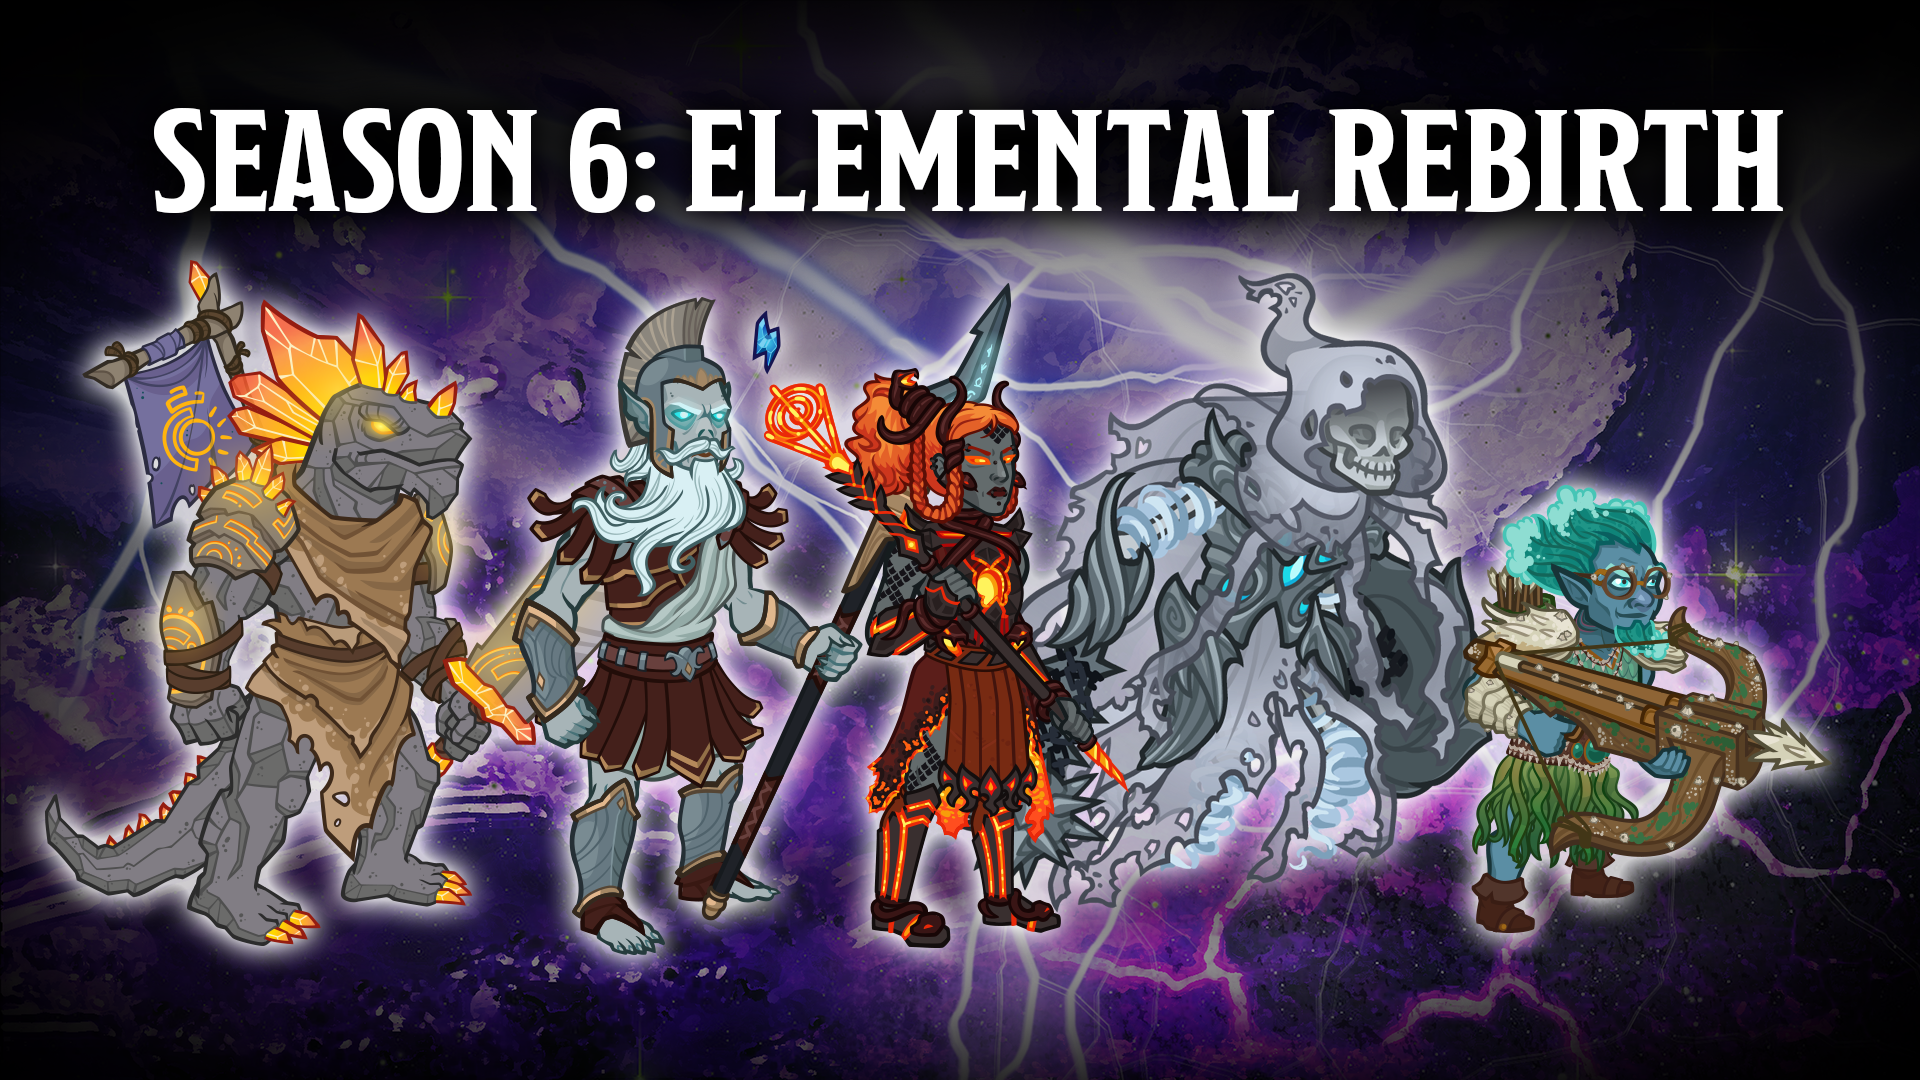
Season 7: The Rivals
Season 7 focuses on Champions from the Rivals of Waterdeep affiliation! There are six Champions that are a part of this affiliation, and three of them were targeted for reworks: Shaka (Seat 9), Selise (Seat 12), and D'hani (Seat 1). Read below to learn more about these Champions, and the details you need to know about Season 7!The focus of Season 7's redesigns is to fix some of the most glaring issues with the targeted Champions. These are Champions with solid bones, but each had an issue or issues that prevented them from rising to greatness. Synergies between the Rivals of Waterdeep Champions already existed, so we haven't focused too much on improving those.
Season 7 begins on Wednesday, January 3rd, 2024, and to celebrate we're going to have a special day of streaming on our Twitch Channel starting at noon Pacific. The day will be capped off by an extraordinary D&D one shot adventure featuring the return of the Rivals of Waterdeep! We're thrilled to have Jasmine Bhullar as the Dungeon Master and players Tanya DePass as Selise, Masood Haque as Gazrick, Shareef Jackson as Shaka, LaTia Jacquise as D'hani, Eugenio Vargas as Kent, and Brian Gray as Virgil. Join us in your fanciest attire at 4pm Pacific for this one night only special reunion event!
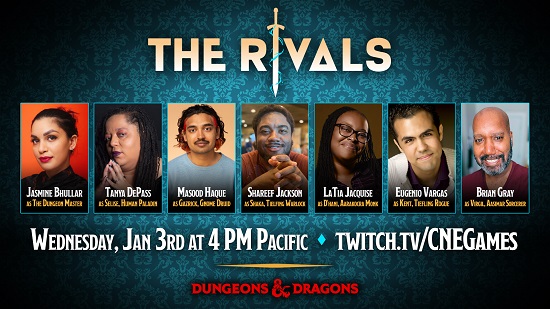
Table of Contents

Champion Overview
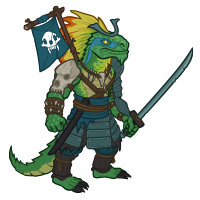
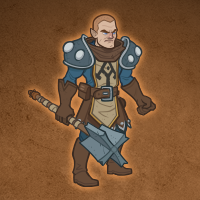
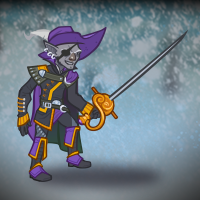
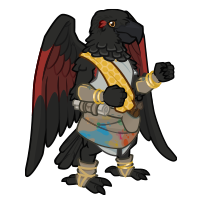
Shaka (Seat 9)
 Shaka's Celestial Puzzle ability is one of the most unique buffs in the game, but it could be confusing to use and the juice wasn't worth the squeeze in many cases. We have added several quality of life changes and buffed the base values to really reward people who take the time and effort to build a unique formation for their Shaka-centric run.
Celestial Puzzle is Shaka's main support ability, which buffs the whole formation. When you unlock it, five slots in the formation are highlighted. Four of these slots have tags assigned to them, while one is hidden and associated with Shaka's specialization. If you place a Champion into a slot that has a tag matching that slot, Celestial Puzzle's buff is increased. Celestial Resistance periodically provides a temporary hit point shield to everyone in the formation, where the size of the shield is buffed by the number of successfully filled Celestial Puzzle slots. If Shaka is adjacent to any of his Celestial Puzzle slots, Feast or Famine further increases the base effect of that buff. Finally, Riddling Rivals increases the base effect of Celestial Puzzle for each other Rival in the formation.
Specializations:
Three of Shaka's specializations unlock his previously secret fifth Celestial Puzzle slot, each one with a different target tag (and a small buff to Celestial Puzzle based on how difficult the target tag would be to fulfill). Since you can see which slot is going to be added and what tag it's going to target, you have plenty of information to pick the right choice for the formation you've built. A final specialization increases the effect of Celestial Resistance.
Using Shaka:
Place Shaka in your formation and unlock his Celestial Puzzle ability, then find your best Champions for the tag targets in his Celestial Puzzle slots. Build a custom formation that fulfills as many puzzle slots as you can to get the biggest buffs from Shaka. You should also try to make sure Shaka is adjacent to as many of his puzzle slots as you can. When it comes time to pick a specialization, choose the one that fits best into the formation you've been building.
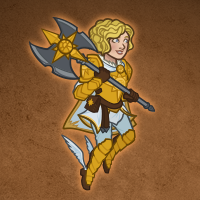
Selise (Seat 12)
 Selise's kit was one of the most complex in the game, but it needed some love to make it a little more useful. We have smoothed out her kit by removing her Reflect stance and moving its effects to Wall stance, providing a more clear progression of stances from Aggressive (pushing) to Wall (tanking) to Last Resort (burning down a boss). We've also provided a new quality of life improvement with a feat that prevents roaming familiars from activating her ultimate (and thus changing her stance when you didn't mean it to change).
Selise's Divine Sense increases the damage of Champions in the two columns behind her, plus it has a secondary effect based on Selise's current shield stance. You can change Selise's shield stance by using her ultimate ability, which unlocks at the same time as Divine Sense. Selise's three stances are Aggressive, Wall, and Last Resort. In Aggressive stance, Divine Sense also decreases affected Champion's attack cooldowns. In Wall stance, Divine Sense's effect is increased and Selise and her nearby allies take less damage. Finally, in Last Resort stance, Vow of Vengeance's base effect is increased by a massive amount that reduces over time. Vow of Vengeance, by the way, is another ability that is active in both Wall and Last Resort stance, and increases the effect of Divine Sense each time an enemy attacks Selise, stacking multiplicatively. Shield of Psychomancy causes Selise to debuff hit-based and armor-based enemies to take extra hits when attacked (synergizing with Gazrick), but is only active while in Aggressive stance. Protect The Party increases the health of other Champions in the formation, further increasing the buff based on the number of Rivals of Waterdeep Champions in the formation. Rivalry's Insight also cares about the number of Rivals in the formation, increasing the effect of Divine Sense for each one. Finally, every 180 seconds when Selise switches from Last Resort to Aggressive stance, she casts Thunderous Smite, dealing massive damage to up to six enemies on the field.
Specializations:
Selise has two sets of specialization choices. During the first set, you can pick a specialization that buffs a specific shield stance. During the second set, you can pick from one of the two stances that you didn't buff, or extend the range of Divine Sense. The buffs are: Relentless Avenger, increasing the number of bonus hits Shield of Psychomancy can inflict. Reflective Shield, deflecting ranged and magical projectiles back at enemies while in Wall stance. And Mithral Skin, reducing the damage Selise takes while in Last Resort stance.
Using Selise:
Place Selise at the front of your formation and switch shield stances based on what your party is doing. While pushing toward your wall in areas you can quickly and easily clear, stay in Aggressive stance to speed up the attacks of Champions near Selise. When you begin to approach your wall (when enemies are surviving long enough to reach your formation), switch into Wall stance to reduce the damage Selise takes while tanking and increase the damage your allies affected by Divine Sense do. If the fight is looking dire, switch into Last Resort stance to provide a big boost of power to your allies, but be sure to switch out of Last Resort once your foes are defeated, as the effect is reduced greatly over time.
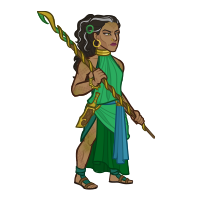
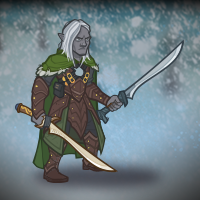
D'hani (Seat 1)
 D'hani is a DPS Champion who is all about painting. In general, the more paint that she has applied to her enemies in the current area, the more damage she does. Paint Them Red applies up to 3 strokes of red paint to enemies D'hani attacks (one stroke per attack). Splash of Yellow can apply one stroke of yellow paint to each enemy. Enemies affiliated by yellow paint drop additional gold when killed. Stroke of Green applies green paint, which causes D'hani's attacks against them to also damage nearby enemies. Blotch of Blue applies blue paint, which stuns enemies and causes boss enemies to take even more damage.
D'hani's Way of the Brush ability keeps track of the total number of enemies she has painted across all resets, and her damage is further increased based on that number. With Friendly Rivalry, she increases her damage based on the number of Rivals of Waterdeep Champions in the formation.
D'hani will always attack the nearest enemy as well as one random enemy, helping her spread her paints. Her ultimate ability attacks and applies paint to five random enemies, and also removes any weather effects in the current area (potentially triggering a stack of Virgil's Weather Control).
Specializations:
D'hani has one specialization for each of her yellow, green, and blue paints. Each specialization increases the effectiveness of that type of paint.
Using D'hani:
Place D'hani anywhere in your formation with as many other Rivals of Waterdeep Champions as you can manage. That's it. D'hani will apply paint more quickly if she can attack faster, so try to team her up with support Champions who will decrease her base attack cooldown.

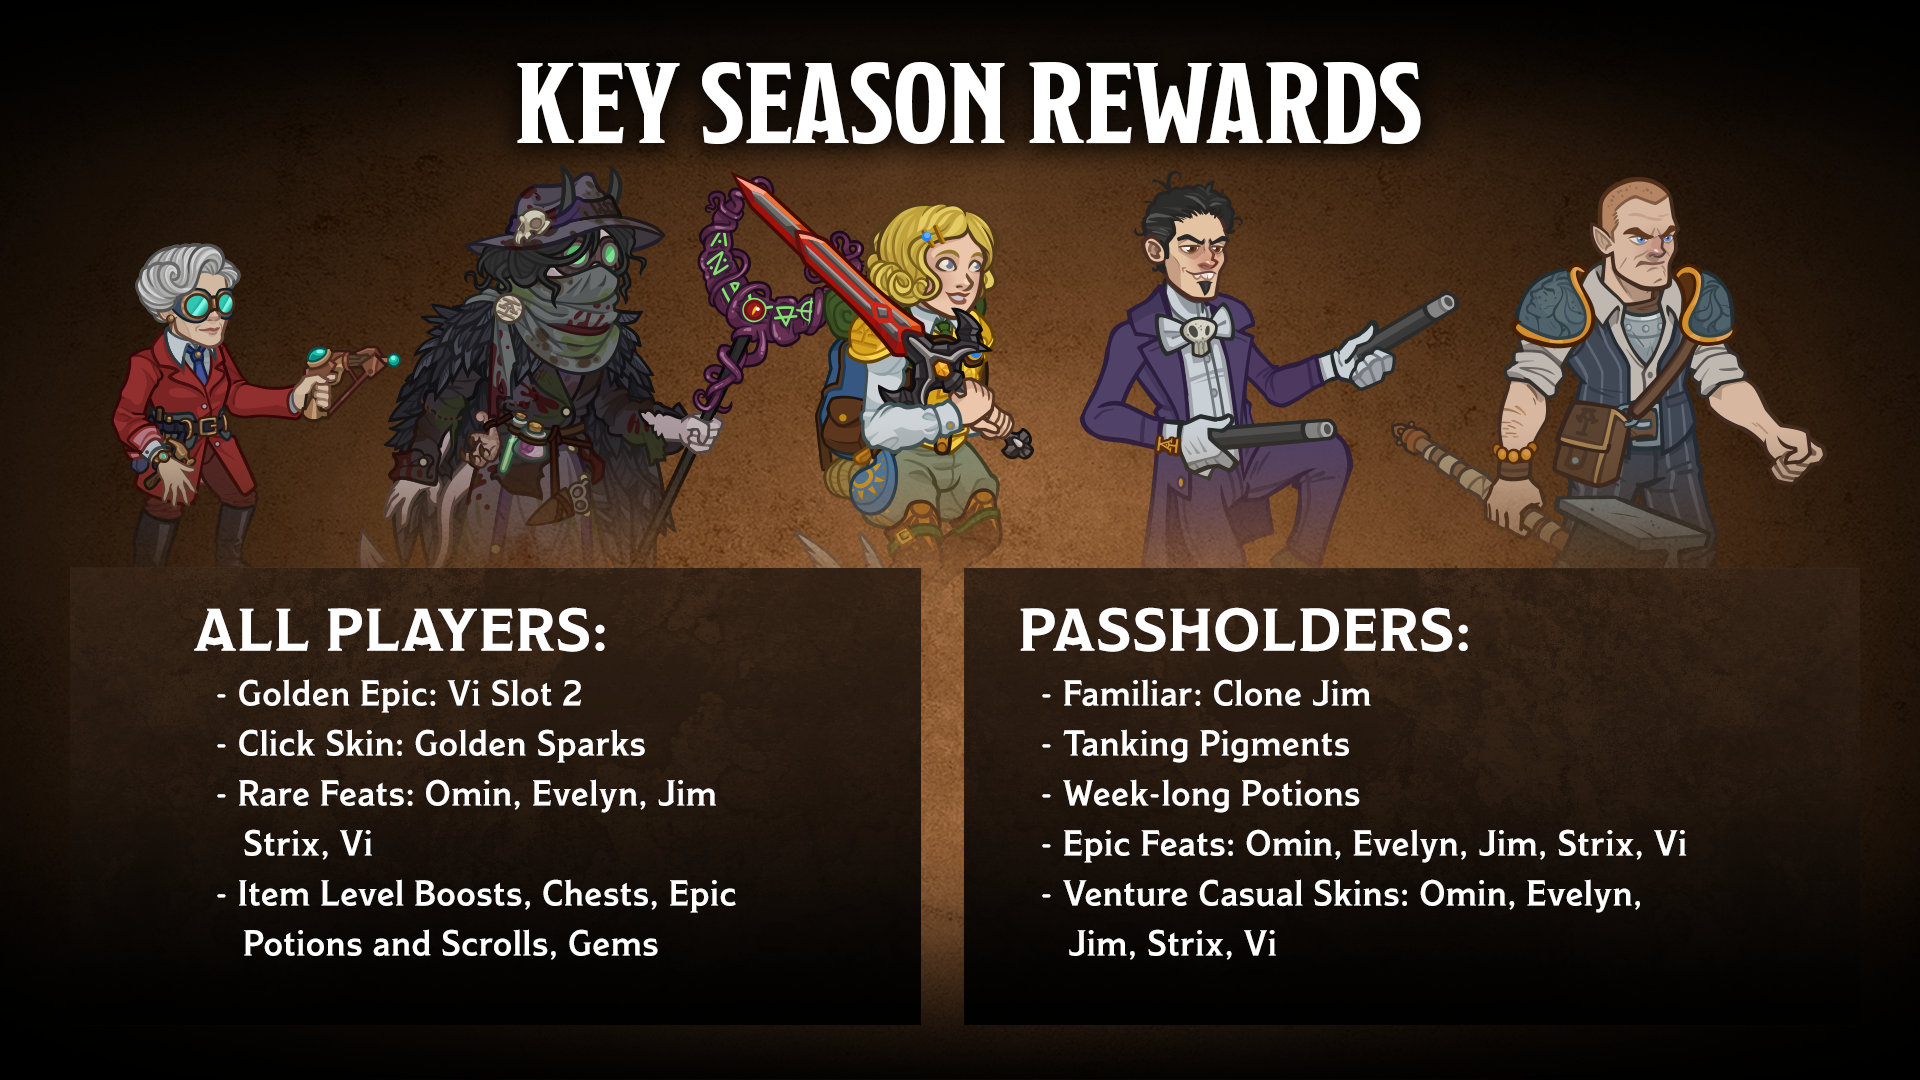
Key Season Rewards
As with last season, the marquee rewards are at level 60. After that, you begin to earn Bonus tokens for every level (two tokens per level for Season Pass purchasers). Each token can be redeemed for one of the 15 unique bonus rewards.
Once a reward has been earned, it cannot be earned again until each type of reward has been earned. Once all rewards are earned, your odds reset. Your odds of a specific type of reward when none have been earned are approximately as follows:
Champion iLevels: 33%
Gems: 13%
Modron Component Chest: 13%
Season Chest: 13%
Blacksmithing Contracts: 6.5%
Bounty Contracts: 6.5%
Supply Chest: 6.5%
Support Pigment: 6.5%
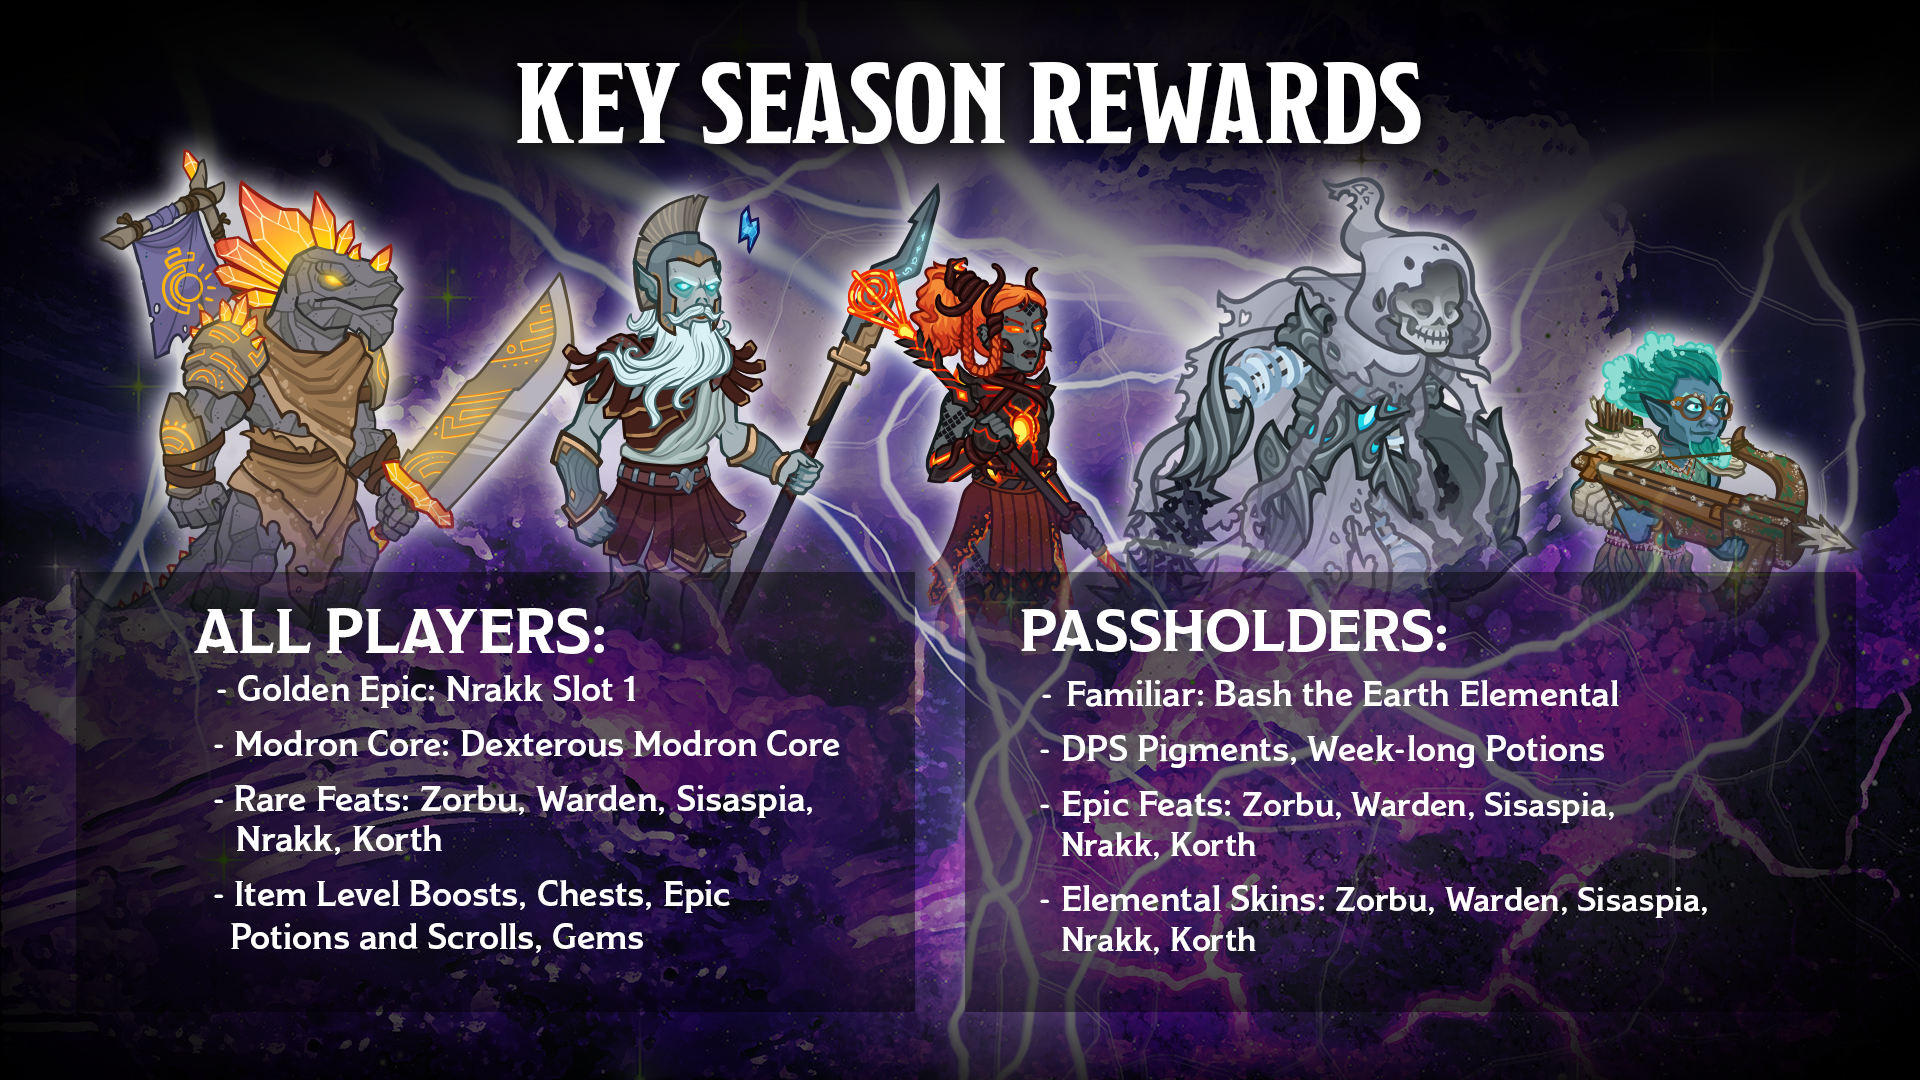
This season includes a new Click Damage Skin, a Golden Epic for Shaka, a new Hawk Man familiar, Epic and Rare feats for all the Season Champions, and exclusive skins for those Champions! It also makes Marvelous Tanking Pigments available for the first time since Season 5! Check out the Rewards track in-game for more detail.
Rewards:
Available to All Players
- Golden Epic: Shaka Slot 5
- Click Damage Skin: Rivals Sword
- Rare Feats: Shaka, D'hani, Kent, Virgil
- Epic Feat: Selise
- Item Level Boosts
- Chests
- Epic Potions and Scrolls
- Gems
Available to Season Passholders
- Familiar: The Hawk Man
- Tanking Pigments
- Week-long Potions
- Epic Feats: Shaka, Selise, D'hani, Kent, Virgil
- Waterdhavian Skins: Shaka, Selise, D'hani, Kent, Virgil

Keywords and Key Abilities
Throughout the season, various quests may reference certain keywords and abilities. Here is a quick reminder on some of those!
BUD-setting: BUD stands for Base Ultimate Damage. Your 'BUD' is based on the DPS of the highest hit that any Champion has recently achieved against a single enemy. Bud-setting Champion, means the Champion who has most recently done the most damage.
- On PC UI, this is visible by mousing over the lightning bolt banner to the left of your Ultimate Attack buttons.
- On Console UI, this is visible by looking to the right of your ultimate bar, on the graphic labeled with 'Ult DPS'.
Event Adventures: Event Adventures are only available in two ways: When the corresponding event is active, or when a time gate for a Champion that was originally available in that event is opened. Event Adventures are home to many unique bosses and creatures, however, some of them can be found outside of their original events in permanent adventures.
Patron Challenges: The Patron system allows you to re-play adventures and variants with additional restrictions, resulting in influence and currency that you can spend in a Patron's given shop. Once you have unlocked a Patron, they will provide you with ten challenges that refresh every Monday at Noon Pacific Time.
- On PC UI, Patrons are accessible through a button on the upper left UI.
- On Console UI, Patrons are accessible in the UI buttons above the Champion seats.
Positional Formation Abilities: Positional Formation Abilities are abilities that trigger based on where a target is in the formation.
Time Gate Adventures: A Time Gate allows you to unlock Champions from previous events you may have missed and/or gear them up for free. You need 6 Time Gate Pieces to open a Time Gate for a Champion, though they open naturally every 2-3 weekends.
- On PC UI, Time Gates are accessible through a button on the upper left UI.
- On Console UI, Time Gates are accessible in the UI buttons above the Champion seats.

Key Enemies
Throughout the season, various quests may reference certain types of enemies. Here is a quick reminder on where to find some of those!
Beast bosses: Beast bosses appear in almost every adventure in Idle Champions. If you're looking for an early beast boss to grind into a paste, the Unearthed Evil adventure in the Grand Tour of the Sword Coast campaign contains a Grizzly Bear boss in area 5!
Beast enemies: Beast monsters can be encountered in most adventures. If you are looking for a good target to encounter beasts, try The Cursed Farmer - the first (non-tutorial) adventure in the Grand Tour of the Sword Coast campaign.
Devourer: The Devourer appears in all the Midwinter event adventures, so look there first if the event is running. If you want even more Devourer fun, and don't feel like opening a Midwinter time gate, it can be found in many other adventures, including the first adventure of the Turn of Fortune's Wheel campaign.
Distractions: Distractions are the clickable items that appear in the background during adventures. Sometimes they also scurry or fly by. Click them before they disappear to gain credit for any quests that call for their destruction! Pro tip: Having six familiars assigned to clicking enemies will also automatically click distractions as soon as they appear!
Elf bosses: As mentioned above, Astral Elves can be found all throughout the Light of Xaryxis campaign, but you can also find elves in other campaigns, for example there are plenty of Drow in the Underdark portions of the Grand Tour of the Sword Coast campaign.
Elf enemies: You can find an Ice Troll ripe for farming in The Giant's Bane Tavern adventure in the Icewind Dale campaign (the very first adventure of the campaign). If that doesn't float your boat, or if your boat is frozen in the lake, there are several other targets scattered throughout the Forgotten Realms.
Fiend enemies: Everyone knows you can farm Imps quickly in The Mad Wizard adventure in the Grand Tour of the Sword Coast campaign, but did you know that other adventures also exist and contain fiend enemies? Well, we think so, at least. We're all just farming The Mad Wizard too.
Gibbering Mouther: The Gibbering Mouther appears in area 35 of all the Fleetswake event adventures. If you're looking for them when the event isn't active, the easiest place to search is the Escort to Waterdeep adventure in the Grand Tour of the Sword Coast campaign.
Humanoid enemies: Humanoid monsters can be encountered in many adventures. If you are looking for a good target to encounter humanoids, try A Mysterious Summons - the first adventure in the Waterdeep: Dragon Heist campaign.
Monstrosity enemies: Monstrosity enemies can be found all throughout the forgotten realms. Check out areas 34 and 35 in The Cursed Farmer adventure in the Grand Tour of the Sword Coast campaign for some Mimics, perhaps the most famous D&D monstrosities!
Nanny Pu'pu: Nanny Pu'pu is the final boss of all the Grand Revel event adventures. If you miss them during the event, you'll need to open a time gate for Birdsong, Paultin, Havilar, Hew Maan, Vi, or Brother Uriah in order to access a Grand Revel adventure.
Plant bosses: There are plenty of evil trees that need to be chopped down through the game, but there are a couple in The Mad Wizard adventure in the Grand Tour of the Sword Coast campaign that make easy targets. Seek out the Shambling Mound in area 25 or the Treant in area 30.
Resurrected Hero of the Vale: This poor guy keeps getting resurrected just so you can kill him again. He appears in both the Highharvestide and Feast of the Moon event adventures, as well as several other adventures. If neither event is available, check out The Mists of Ravenloft adventure in the Grand Tour of the Sword Coast campaign, or Resolve Amongst Chaos in the Baldur's Gate: Descent Into Avernus campaign.
Segmented health: Creatures with segmented health are available on many different adventures. Bosses with hit-based or armor-based health will count towards this quest. The Tyrannosaurus Zombie on area 50 of Running of the Saurs in the Tomb of Annihilation campaign is a great early-game example of a segmented health boss!
Undead bosses: You can cleanse the world of stinky undead in many adventures. Might we suggest the Upright Crawling Claw in The Mad Wizard adv-- wait, no. This one isn't in the Mad Wizard adventure. Instead, load up the Unearthed Evil adventure in the Grand Tour of the Sword Coast campaign. It's good to have some variety.
Undead enemies: Undead monsters are available in many different adventures. If you are looking for a good target to encounter undead, you can find Zombies in Terror in the Dark - the fourth adventure in the Grand Tour of the Sword Coast campaign.
Selise's kit was one of the most complex in the game, but it needed some love to make it a little more useful. We have smoothed out her kit by removing her Reflect stance and moving its effects to Wall stance, providing a more clear progression of stances from Aggressive (pushing) to Wall (tanking) to Last Resort (burning down a boss). We've also provided a new quality of life improvement with a feat that prevents roaming familiars from activating her ultimate (and thus changing her stance when you didn't mean it to change).
D'hani is a DPS Champion who is all about painting. In general, the more paint that she has applied to her enemies in the current area, the more damage she does. Paint Them Red applies up to 3 strokes of red paint to enemies D'hani attacks (one stroke per attack). Splash of Yellow can apply one stroke of yellow paint to each enemy. Enemies affiliated by yellow paint drop additional gold when killed. Stroke of Green applies green paint, which causes D'hani's attacks against them to also damage nearby enemies. Blotch of Blue applies blue paint, which stuns enemies and causes boss enemies to take even more damage.
Once a reward has been earned, it cannot be earned again until each type of reward has been earned. Once all rewards are earned, your odds reset. Your odds of a specific type of reward when none have been earned are approximately as follows:
This season includes a new Click Damage Skin, a Golden Epic for Shaka, a new Hawk Man familiar, Epic and Rare feats for all the Season Champions, and exclusive skins for those Champions! It also makes Marvelous Tanking Pigments available for the first time since Season 5! Check out the Rewards track in-game for more detail.
Rewards:
Available to All Players
- Golden Epic: Shaka Slot 5
- Click Damage Skin: Rivals Sword
- Rare Feats: Shaka, D'hani, Kent, Virgil
- Epic Feat: Selise
- Item Level Boosts
- Chests
- Epic Potions and Scrolls
- Gems
Available to Season Passholders
- Familiar: The Hawk Man
- Tanking Pigments
- Week-long Potions
- Epic Feats: Shaka, Selise, D'hani, Kent, Virgil
- Waterdhavian Skins: Shaka, Selise, D'hani, Kent, Virgil
Keywords and Key Abilities
BUD-setting: BUD stands for Base Ultimate Damage. Your 'BUD' is based on the DPS of the highest hit that any Champion has recently achieved against a single enemy. Bud-setting Champion, means the Champion who has most recently done the most damage.
- On PC UI, this is visible by mousing over the lightning bolt banner to the left of your Ultimate Attack buttons.
- On Console UI, this is visible by looking to the right of your ultimate bar, on the graphic labeled with 'Ult DPS'.
Patron Challenges: The Patron system allows you to re-play adventures and variants with additional restrictions, resulting in influence and currency that you can spend in a Patron's given shop. Once you have unlocked a Patron, they will provide you with ten challenges that refresh every Monday at Noon Pacific Time.
- On PC UI, Patrons are accessible through a button on the upper left UI.
- On Console UI, Patrons are accessible in the UI buttons above the Champion seats.
Time Gate Adventures: A Time Gate allows you to unlock Champions from previous events you may have missed and/or gear them up for free. You need 6 Time Gate Pieces to open a Time Gate for a Champion, though they open naturally every 2-3 weekends.
- On PC UI, Time Gates are accessible through a button on the upper left UI.
- On Console UI, Time Gates are accessible in the UI buttons above the Champion seats.
Key Enemies
Beast bosses: Beast bosses appear in almost every adventure in Idle Champions. If you're looking for an early beast boss to grind into a paste, the Unearthed Evil adventure in the Grand Tour of the Sword Coast campaign contains a Grizzly Bear boss in area 5!
Beast enemies: Beast monsters can be encountered in most adventures. If you are looking for a good target to encounter beasts, try The Cursed Farmer - the first (non-tutorial) adventure in the Grand Tour of the Sword Coast campaign.
Devourer: The Devourer appears in all the Midwinter event adventures, so look there first if the event is running. If you want even more Devourer fun, and don't feel like opening a Midwinter time gate, it can be found in many other adventures, including the first adventure of the Turn of Fortune's Wheel campaign.
Distractions: Distractions are the clickable items that appear in the background during adventures. Sometimes they also scurry or fly by. Click them before they disappear to gain credit for any quests that call for their destruction! Pro tip: Having six familiars assigned to clicking enemies will also automatically click distractions as soon as they appear!
Elf bosses: As mentioned above, Astral Elves can be found all throughout the Light of Xaryxis campaign, but you can also find elves in other campaigns, for example there are plenty of Drow in the Underdark portions of the Grand Tour of the Sword Coast campaign.
Elf enemies: You can find an Ice Troll ripe for farming in The Giant's Bane Tavern adventure in the Icewind Dale campaign (the very first adventure of the campaign). If that doesn't float your boat, or if your boat is frozen in the lake, there are several other targets scattered throughout the Forgotten Realms.
Fiend enemies: Everyone knows you can farm Imps quickly in The Mad Wizard adventure in the Grand Tour of the Sword Coast campaign, but did you know that other adventures also exist and contain fiend enemies? Well, we think so, at least. We're all just farming The Mad Wizard too.
Gibbering Mouther: The Gibbering Mouther appears in area 35 of all the Fleetswake event adventures. If you're looking for them when the event isn't active, the easiest place to search is the Escort to Waterdeep adventure in the Grand Tour of the Sword Coast campaign.
Humanoid enemies: Humanoid monsters can be encountered in many adventures. If you are looking for a good target to encounter humanoids, try A Mysterious Summons - the first adventure in the Waterdeep: Dragon Heist campaign.
Monstrosity enemies: Monstrosity enemies can be found all throughout the forgotten realms. Check out areas 34 and 35 in The Cursed Farmer adventure in the Grand Tour of the Sword Coast campaign for some Mimics, perhaps the most famous D&D monstrosities!
Nanny Pu'pu: Nanny Pu'pu is the final boss of all the Grand Revel event adventures. If you miss them during the event, you'll need to open a time gate for Birdsong, Paultin, Havilar, Hew Maan, Vi, or Brother Uriah in order to access a Grand Revel adventure.
Plant bosses: There are plenty of evil trees that need to be chopped down through the game, but there are a couple in The Mad Wizard adventure in the Grand Tour of the Sword Coast campaign that make easy targets. Seek out the Shambling Mound in area 25 or the Treant in area 30.
Resurrected Hero of the Vale: This poor guy keeps getting resurrected just so you can kill him again. He appears in both the Highharvestide and Feast of the Moon event adventures, as well as several other adventures. If neither event is available, check out The Mists of Ravenloft adventure in the Grand Tour of the Sword Coast campaign, or Resolve Amongst Chaos in the Baldur's Gate: Descent Into Avernus campaign.
Segmented health: Creatures with segmented health are available on many different adventures. Bosses with hit-based or armor-based health will count towards this quest. The Tyrannosaurus Zombie on area 50 of Running of the Saurs in the Tomb of Annihilation campaign is a great early-game example of a segmented health boss!
Undead bosses: You can cleanse the world of stinky undead in many adventures. Might we suggest the Upright Crawling Claw in The Mad Wizard adv-- wait, no. This one isn't in the Mad Wizard adventure. Instead, load up the Unearthed Evil adventure in the Grand Tour of the Sword Coast campaign. It's good to have some variety.
Undead enemies: Undead monsters are available in many different adventures. If you are looking for a good target to encounter undead, you can find Zombies in Terror in the Dark - the fourth adventure in the Grand Tour of the Sword Coast campaign.