Search News:


Archives by month:

March 2024
February 2024
January 2024
December 2023
November 2023
October 2023
September 2023
August 2023
July 2023
June 2023
May 2023
April 2023
March 2023
February 2023
January 2023
December 2022
November 2022
October 2022
September 2022
August 2022
July 2022
June 2022
May 2022
April 2022
March 2022
February 2022
January 2022
December 2021
November 2021
October 2021
September 2021
August 2021
July 2021
June 2021
May 2021
April 2021
March 2021
February 2021
January 2021
December 2020
November 2020
October 2020
September 2020
August 2020
July 2020
June 2020
May 2020
April 2020
March 2020
February 2020
January 2020
December 2019
November 2019
October 2019
September 2019
August 2019
July 2019
June 2019
May 2019
April 2019
March 2019
February 2019
January 2019
December 2018
November 2018
October 2018
September 2018
August 2018
July 2018
June 2018
May 2018
April 2018
March 2018
February 2018
January 2018
December 2017
November 2017
October 2017
September 2017
August 2017
July 2017
June 2017
May 2017
April 2017
March 2017
February 2017
January 2017
December 2016
November 2016
October 2016
September 2016
August 2016
July 2016
June 2016
May 2016
April 2016
March 2016
February 2016
January 2016
December 2015
November 2015
October 2015
September 2015
August 2015
July 2015
June 2015
May 2015
April 2015
March 2015
February 2015
January 2015
December 2014
November 2014
October 2014
September 2014
August 2014
July 2014
June 2014
May 2014
April 2014
March 2014
February 2014
January 2014
December 2013
April 2012
August 2011
March 2011

Blogs Categories:

Codename News
Bush Whacker 2
Egg Breaker Adventures
Shards of Titan
Legacy Games
Crusaders of the Lost Idols
Tap Tap Movie
Idle Champions

Popular tags: [Clear Tags]

bw2, event, champions, idle, new content, update, crusaders, release notes, access, early, new, weekend, buff, champion spotlight, dragons, eba, videogame, game, dungeons, charity, mini, d&d, patch notes, idols, community, change log, objectives, legacy games, baldur's gate, 2018, nate, collector, fun, creature, halloween, summer, spotlight, contest, content, grand tour, 2017, anniversary, high rollers, idle champions, 2023, 2021, icewind dale, quest, 2022.
March 6th
Idle Champions: Festival of Fools 7 
Posted in Idle Champions.

How far would you go to celebrate foolishness?

Festival of Fools is a time-honored tradition in Sword Coast communities. Townsfolk engage in the usual gluttonous consumption of food and drink during the festivities, but they also play pranks on each other.

Unfortunately, one prankster has decided to play a practical joke on a Frost Giant nearby...

Festival of Fools 7 is our first Events 2.0! It introduces The Dark Urge, the Dragonborn Sorcerer from the 2023 Game of the Year - Baldur's Gate 3. This DPS Champion is ready to spread evil across the Forgotten Realms with the rest of the Absolute Adversaries. It also reintroduces Dhadius, the Human Wizard from the Betrayal at Baldur's Gate board game. You can learn more about the rework to Dhadius below. Also, you can choose three of eight previous Champions to unlock over the course of Festival of Fools 7!

Note: Going forward, Adventure Variants information will now be found in the corresponding Champion's Spotlight. This change is being made so that all information about a Champion and their adventures can be found in one place.

Table of Contents


The Dark Urge


    The Dark Urge remembers nothing but a path paved with blood. Unimaginable cruelty whispers from within. Can he escape it? Would he even want to?

The Dark Urge is a DPS Champion who counts the number of enemies he has slain. Like the other Absolute Adversaries, he has a mind flayer tadpole in his head, and his damage increases as more Champions with tadpoles are added to the formation. Will you choose to embrace his murderous urges, or fight against them? That choice will be made once you unlock them in seat 11 opposite Jamiliah.

Learn more about The Dark Urge in our Champion Spotlight!

Dhadius

Dungeons & Dragons Dhadius

    Dhadius is a mage of legendary status and acclaim...at least, in his own mind. Being an egomaniac, he seeks out esoteric lore and rare magical secrets so he may know things that the 'common fools' do not. Dhadius hails from Luskan in the north, where he is a member of the Arcane Brotherhood, an infamous group of wizards, and is determined to let it be known far and wide that he is a wizard to be respected and feared.

Dhadius has been reworked to modernize his kit and give him some additional formation niches that he may be able to slot into. We've buffed up his abilities and altered his equipment so that his powerful magic is better utilized and encourages more experimentation. This glass cannon can be unlocked in seat 5 opposite Calliope.

Learn more about the changes coming to Dhadius in our Reintroduction Spotlight!

Flex Champions

Flex Slots allow players to unlock additional Champions and earn chests during events, choosing from a pool of retired Champions associated with the event. This pool of retired Champions includes the Champions from previous years of the event as well as some Champions whose events have been retired. This events Flex Slot pool includes:

  • K'thriss (Seat 1)
  • Regis (Seat 2)
  • Briv (Seat 5)
  • Alyndra (Seat 6)

  • Tatyana (Seat 8)
  • Rosie (Seat 10)
  • Strix (Seat 11)
  • Miria (Seat 12)

Events 2.0

Event Changes

Events 2.0 is a significant update to the events system in Idle Champions. Because players will now be able to unlock more Champions, content, and rewards through Events 2.0, we are increasing the duration of events from 12 days to 21 days. Events will typically begin on the first Wednesday of each month and run for three weeks. Content updates for Idle Champions will occur on the Wednesdays outside events.

Along with the Event duration change we are reducing the number of annual events, shifting from 17 annual events down to 12. Long term, we plan to retire the Midwinter, Greengrass, The Running, Midsummer, and Brightswords events. However, as we transition over to the new Event 2.0 schedule, there will be a Greengrass event in April 2024.

Quality of Life Updates

As part of the Events 2.0 update, we are also making several quality of life updates:
  • Bounty Contracts used outside of events will award Event Tokens for the next event.
  • Event adventures, variants, and free plays no longer cost Event Tokens to start.
  • Event Tokens are now only used to purchase Event Chests directly (free plays no longer need to be grinded to obtain extra chests).
  • Event Tokens left over once an event ends will automatically be converted to Champion chests.
  • Retired Champions may come out of retirement.
  • Event Boons are granted to players who purchase specially marked event-related DLC during an event. There are four tiers of Event Boons that offer buffs to Champion Damage, Gold Find, Champion Health, Click Damage, and Speed. These buffs increase with each tier of Event Boon. Additionally, the first purchase that grants an Event Boon will also unlock the Supporter Slot.

To learn more about what is changing with Events 2.0 check out our Blog Post! Join our amazing community with any of the links below:
February 21st
Idle Champions: Fleetswake 7 
Posted in Idle Champions.

You've been recruited by a merchant guild in Waterdeep to look into a number of mysterious missing ships over the past year. The Fair Seas Festival is a good time to look into this as people are quite open about the dangers of the sea, the fury of Umberlee, and so forth.

Many people blame Umberlee for the missing ships, but the merchant guild isn't so sure...

Fleetswake 7 introduces Dynaheir, the Wychlaran wizard from Baldur's Gate 2! Also returning is Solaak, the kalashtar ranger, and Desmond, the werewolf ranger! Players have until Monday, March 4th at 12 PM Pacific to complete their Fleetswake 7 unlocks and objectives.

Dynaheir


    Dynaheir is a Wychlaran Invoker hailing from the distant land of Rashemen, who travels with her stalwart bodyguard, Minsc. She carries a deep-seated animosity toward the Red Wizards of Thay, and the mere mention of these hated adversaries sparks a fiery determination in her eyes and a steely edge to her voice.
Dynaheir the Invoker is a Support and Speed Champion who buffs hardy Champions while helping increase quest progress. This human wizard can be found in Seat 3 opposite of Nayeli once she is unlocked.

For more information on Dynaheir and her abilities, check out her Champion Spotlight!

Year Seven Variants


The Wychlaran of Rashemen - Search for some missing ships during Fleetswake in Waterdeep with Dynaheir!
  • Dynaheir joins the formation. She can be moved, but not removed.
  • You may only use Champions with a CON of 15 or higher.
  • Getting to know Dynaheir: Dynaheir increases the damage of resilient heroes. Use as many as you can to get the most from her abilities!
  • Reach Area 75.

Thayan Threat - Search for some missing ships during Fleetswake in Waterdeep while fighting Red Wizards!
  • Dynaheir joins the formation. She can be moved, but not removed.
  • Quest requirements are increased by 25% in non-boss areas.
  • A Red Wizard spawns with every wave in non-boss areas.
  • Getting to know Dynaheir: Humanoids (and therefore Red Wizards) are Dynaheir's favored foe, and her favored foes have a chance to drop double quest progress when defeated!
  • Reach Area 125.

Minsc's Dajemma - Search for some missing ships while helping Minsc with his journeys.
  • Dynaheir and Minsc join the formation. They can be moved, but not removed.
  • You may not use Tanking Champions.
  • Getting to know Dynaheir: Minsc is Dynaheir's bodyguard. Use Dynaheir's specialization choice to turn him into a durable defender!
  • Reach Area 175.

We would love to hear about your experiences in Idle Champions on the Idle Champions Subreddit, on the Steam forums, or on the Official Idle Champions Discord!


February 14th
Idle Champions: Turn of Fortune's Wheel Part 3 
Posted in Idle Champions.

This week the Turn of Fortune's Wheel continues! With the help of Farrow, the Champions find themselves in the titular Fortune's Wheel - a casino in Sigil. There they meet the owner, Shemeshka, and get more information about their glitch situation. After that, they must delve deeper into the Mortuary to find another glitched Champion and make it out with their souls intact!

Note: You will need to have completed the previous two Turn of Fortune's Wheel adventures, Welcome to Sigil and Fast Food, in order to access these new adventures.


The Fortune's Wheel

The Champions are kept on their toes with the pandemonium at the Fortune's Wheel casino!
Play Reward: Gnome Avren Skin
  • Variant: The Misfortune's Wheel - The Champions deal with the chaos of the Fortune's Wheel casino while broke!
    • Gold Find is reduced by 99%.
    • You may not use Champions with the Gold Find role.
    • Complete area 550

A Glitch in the Mortuary

Descend further into the Mortuary and find another glitched Champion!
Play Reward: Gnome Glitch Avren Feat
  • A Gnome in the Mortuary - Explore the depths of the Mortuary with Gnome Avren!
  • Prerequisites: Must have Avren unlocked.
    • You may only use Champions that are partially or totally neutral.
    • Avren joins the formation.
    • Complete area 600


We would love to hear about your experiences in the Outlands on the Idle Champions Subreddit, on the Steam forums, or on the Official Idle Champions Discord!

January 3rd
Idle Champions: Season 7 Overview 
Posted in Idle Champions.

Season 7: The Rivals

Season 7 focuses on Champions from the Rivals of Waterdeep affiliation! There are six Champions that are a part of this affiliation, and three of them were targeted for reworks: Shaka (Seat 9), Selise (Seat 12), and D'hani (Seat 1). Read below to learn more about these Champions, and the details you need to know about Season 7!

The focus of Season 7's redesigns is to fix some of the most glaring issues with the targeted Champions. These are Champions with solid bones, but each had an issue or issues that prevented them from rising to greatness. Synergies between the Rivals of Waterdeep Champions already existed, so we haven't focused too much on improving those.

Season 7 begins on Wednesday, January 3rd, 2024, and to celebrate we're going to have a special day of streaming on our Twitch Channel starting at noon Pacific. The day will be capped off by an extraordinary D&D one shot adventure featuring the return of the Rivals of Waterdeep! We're thrilled to have Jasmine Bhullar as the Dungeon Master and players Tanya DePass as Selise, Masood Haque as Gazrick, Shareef Jackson as Shaka, LaTia Jacquise as D'hani, Eugenio Vargas as Kent, and Brian Gray as Virgil. Join us in your fanciest attire at 4pm Pacific for this one night only special reunion event!

The Rivals one shot

Table of Contents


Season 7 The Rivals

Champion Overview

Shaka (Seat 9)

Shaka
Shaka's Celestial Puzzle ability is one of the most unique buffs in the game, but it could be confusing to use and the juice wasn't worth the squeeze in many cases. We have added several quality of life changes and buffed the base values to really reward people who take the time and effort to build a unique formation for their Shaka-centric run.

Celestial Puzzle is Shaka's main support ability, which buffs the whole formation. When you unlock it, five slots in the formation are highlighted. Four of these slots have tags assigned to them, while one is hidden and associated with Shaka's specialization. If you place a Champion into a slot that has a tag matching that slot, Celestial Puzzle's buff is increased. Celestial Resistance periodically provides a temporary hit point shield to everyone in the formation, where the size of the shield is buffed by the number of successfully filled Celestial Puzzle slots. If Shaka is adjacent to any of his Celestial Puzzle slots, Feast or Famine further increases the base effect of that buff. Finally, Riddling Rivals increases the base effect of Celestial Puzzle for each other Rival in the formation.

Specializations: Three of Shaka's specializations unlock his previously secret fifth Celestial Puzzle slot, each one with a different target tag (and a small buff to Celestial Puzzle based on how difficult the target tag would be to fulfill). Since you can see which slot is going to be added and what tag it's going to target, you have plenty of information to pick the right choice for the formation you've built. A final specialization increases the effect of Celestial Resistance.

Using Shaka: Place Shaka in your formation and unlock his Celestial Puzzle ability, then find your best Champions for the tag targets in his Celestial Puzzle slots. Build a custom formation that fulfills as many puzzle slots as you can to get the biggest buffs from Shaka. You should also try to make sure Shaka is adjacent to as many of his puzzle slots as you can. When it comes time to pick a specialization, choose the one that fits best into the formation you've been building.

Selise (Seat 12)

Selise
Selise's kit was one of the most complex in the game, but it needed some love to make it a little more useful. We have smoothed out her kit by removing her Reflect stance and moving its effects to Wall stance, providing a more clear progression of stances from Aggressive (pushing) to Wall (tanking) to Last Resort (burning down a boss). We've also provided a new quality of life improvement with a feat that prevents roaming familiars from activating her ultimate (and thus changing her stance when you didn't mean it to change).

Selise's Divine Sense increases the damage of Champions in the two columns behind her, plus it has a secondary effect based on Selise's current shield stance. You can change Selise's shield stance by using her ultimate ability, which unlocks at the same time as Divine Sense. Selise's three stances are Aggressive, Wall, and Last Resort. In Aggressive stance, Divine Sense also decreases affected Champion's attack cooldowns. In Wall stance, Divine Sense's effect is increased and Selise and her nearby allies take less damage. Finally, in Last Resort stance, Vow of Vengeance's base effect is increased by a massive amount that reduces over time. Vow of Vengeance, by the way, is another ability that is active in both Wall and Last Resort stance, and increases the effect of Divine Sense each time an enemy attacks Selise, stacking multiplicatively. Shield of Psychomancy causes Selise to debuff hit-based and armor-based enemies to take extra hits when attacked (synergizing with Gazrick), but is only active while in Aggressive stance. Protect The Party increases the health of other Champions in the formation, further increasing the buff based on the number of Rivals of Waterdeep Champions in the formation. Rivalry's Insight also cares about the number of Rivals in the formation, increasing the effect of Divine Sense for each one. Finally, every 180 seconds when Selise switches from Last Resort to Aggressive stance, she casts Thunderous Smite, dealing massive damage to up to six enemies on the field.

Specializations: Selise has two sets of specialization choices. During the first set, you can pick a specialization that buffs a specific shield stance. During the second set, you can pick from one of the two stances that you didn't buff, or extend the range of Divine Sense. The buffs are: Relentless Avenger, increasing the number of bonus hits Shield of Psychomancy can inflict. Reflective Shield, deflecting ranged and magical projectiles back at enemies while in Wall stance. And Mithral Skin, reducing the damage Selise takes while in Last Resort stance.

Using Selise: Place Selise at the front of your formation and switch shield stances based on what your party is doing. While pushing toward your wall in areas you can quickly and easily clear, stay in Aggressive stance to speed up the attacks of Champions near Selise. When you begin to approach your wall (when enemies are surviving long enough to reach your formation), switch into Wall stance to reduce the damage Selise takes while tanking and increase the damage your allies affected by Divine Sense do. If the fight is looking dire, switch into Last Resort stance to provide a big boost of power to your allies, but be sure to switch out of Last Resort once your foes are defeated, as the effect is reduced greatly over time.

D'hani (Seat 1)

D'hani
D'hani is a DPS Champion who is all about painting. In general, the more paint that she has applied to her enemies in the current area, the more damage she does. Paint Them Red applies up to 3 strokes of red paint to enemies D'hani attacks (one stroke per attack). Splash of Yellow can apply one stroke of yellow paint to each enemy. Enemies affiliated by yellow paint drop additional gold when killed. Stroke of Green applies green paint, which causes D'hani's attacks against them to also damage nearby enemies. Blotch of Blue applies blue paint, which stuns enemies and causes boss enemies to take even more damage.

D'hani's Way of the Brush ability keeps track of the total number of enemies she has painted across all resets, and her damage is further increased based on that number. With Friendly Rivalry, she increases her damage based on the number of Rivals of Waterdeep Champions in the formation.

D'hani will always attack the nearest enemy as well as one random enemy, helping her spread her paints. Her ultimate ability attacks and applies paint to five random enemies, and also removes any weather effects in the current area (potentially triggering a stack of Virgil's Weather Control).

Specializations: D'hani has one specialization for each of her yellow, green, and blue paints. Each specialization increases the effectiveness of that type of paint.

Using D'hani: Place D'hani anywhere in your formation with as many other Rivals of Waterdeep Champions as you can manage. That's it. D'hani will apply paint more quickly if she can attack faster, so try to team her up with support Champions who will decrease her base attack cooldown.

Season 7 The Rivals

Key Season Rewards

As with last season, the marquee rewards are at level 60. After that, you begin to earn Bonus tokens for every level (two tokens per level for Season Pass purchasers). Each token can be redeemed for one of the 15 unique bonus rewards.

Once a reward has been earned, it cannot be earned again until each type of reward has been earned. Once all rewards are earned, your odds reset. Your odds of a specific type of reward when none have been earned are approximately as follows:

  • Champion iLevels: 33%
  • Gems: 13%
  • Modron Component Chest: 13%
  • Season Chest: 13%
  • Blacksmithing Contracts: 6.5%
  • Bounty Contracts: 6.5%
  • Supply Chest: 6.5%
  • Support Pigment: 6.5%


  • This season includes a new Click Damage Skin, a Golden Epic for Shaka, a new Hawk Man familiar, Epic and Rare feats for all the Season Champions, and exclusive skins for those Champions! It also makes Marvelous Tanking Pigments available for the first time since Season 5! Check out the Rewards track in-game for more detail.

    Rewards:

    Available to All Players

    • Golden Epic: Shaka Slot 5
    • Click Damage Skin: Rivals Sword
    • Rare Feats: Shaka, D'hani, Kent, Virgil
    • Epic Feat: Selise
    • Item Level Boosts
    • Chests
    • Epic Potions and Scrolls
    • Gems

    Available to Season Passholders

    • Familiar: The Hawk Man
    • Tanking Pigments
    • Week-long Potions
    • Epic Feats: Shaka, Selise, D'hani, Kent, Virgil
    • Waterdhavian Skins: Shaka, Selise, D'hani, Kent, Virgil


    Season 7 Keywords and Key Abilities

    Keywords and Key Abilities

    Throughout the season, various quests may reference certain keywords and abilities. Here is a quick reminder on some of those!

    BUD-setting: BUD stands for Base Ultimate Damage. Your 'BUD' is based on the DPS of the highest hit that any Champion has recently achieved against a single enemy. Bud-setting Champion, means the Champion who has most recently done the most damage.
    • On PC UI, this is visible by mousing over the lightning bolt banner to the left of your Ultimate Attack buttons.
    • On Console UI, this is visible by looking to the right of your ultimate bar, on the graphic labeled with 'Ult DPS'.
    Event Adventures: Event Adventures are only available in two ways: When the corresponding event is active, or when a time gate for a Champion that was originally available in that event is opened. Event Adventures are home to many unique bosses and creatures, however, some of them can be found outside of their original events in permanent adventures.

    Patron Challenges: The Patron system allows you to re-play adventures and variants with additional restrictions, resulting in influence and currency that you can spend in a Patron's given shop. Once you have unlocked a Patron, they will provide you with ten challenges that refresh every Monday at Noon Pacific Time.
    • On PC UI, Patrons are accessible through a button on the upper left UI.
    • On Console UI, Patrons are accessible in the UI buttons above the Champion seats.
    Positional Formation Abilities: Positional Formation Abilities are abilities that trigger based on where a target is in the formation.

    Time Gate Adventures: A Time Gate allows you to unlock Champions from previous events you may have missed and/or gear them up for free. You need 6 Time Gate Pieces to open a Time Gate for a Champion, though they open naturally every 2-3 weekends.
    • On PC UI, Time Gates are accessible through a button on the upper left UI.
    • On Console UI, Time Gates are accessible in the UI buttons above the Champion seats.
    Season 7 Key Enemies

    Key Enemies

    Throughout the season, various quests may reference certain types of enemies. Here is a quick reminder on where to find some of those!

    Beast bosses: Beast bosses appear in almost every adventure in Idle Champions. If you're looking for an early beast boss to grind into a paste, the Unearthed Evil adventure in the Grand Tour of the Sword Coast campaign contains a Grizzly Bear boss in area 5!

    Beast enemies: Beast monsters can be encountered in most adventures. If you are looking for a good target to encounter beasts, try The Cursed Farmer - the first (non-tutorial) adventure in the Grand Tour of the Sword Coast campaign.

    Devourer: The Devourer appears in all the Midwinter event adventures, so look there first if the event is running. If you want even more Devourer fun, and don't feel like opening a Midwinter time gate, it can be found in many other adventures, including the first adventure of the Turn of Fortune's Wheel campaign.

    Distractions: Distractions are the clickable items that appear in the background during adventures. Sometimes they also scurry or fly by. Click them before they disappear to gain credit for any quests that call for their destruction! Pro tip: Having six familiars assigned to clicking enemies will also automatically click distractions as soon as they appear!

    Elf bosses: As mentioned above, Astral Elves can be found all throughout the Light of Xaryxis campaign, but you can also find elves in other campaigns, for example there are plenty of Drow in the Underdark portions of the Grand Tour of the Sword Coast campaign.

    Elf enemies: You can find an Ice Troll ripe for farming in The Giant's Bane Tavern adventure in the Icewind Dale campaign (the very first adventure of the campaign). If that doesn't float your boat, or if your boat is frozen in the lake, there are several other targets scattered throughout the Forgotten Realms.

    Fiend enemies: Everyone knows you can farm Imps quickly in The Mad Wizard adventure in the Grand Tour of the Sword Coast campaign, but did you know that other adventures also exist and contain fiend enemies? Well, we think so, at least. We're all just farming The Mad Wizard too.

    Gibbering Mouther: The Gibbering Mouther appears in area 35 of all the Fleetswake event adventures. If you're looking for them when the event isn't active, the easiest place to search is the Escort to Waterdeep adventure in the Grand Tour of the Sword Coast campaign.

    Humanoid enemies: Humanoid monsters can be encountered in many adventures. If you are looking for a good target to encounter humanoids, try A Mysterious Summons - the first adventure in the Waterdeep: Dragon Heist campaign.

    Monstrosity enemies: Monstrosity enemies can be found all throughout the forgotten realms. Check out areas 34 and 35 in The Cursed Farmer adventure in the Grand Tour of the Sword Coast campaign for some Mimics, perhaps the most famous D&D monstrosities!

    Nanny Pu'pu: Nanny Pu'pu is the final boss of all the Grand Revel event adventures. If you miss them during the event, you'll need to open a time gate for Birdsong, Paultin, Havilar, Hew Maan, Vi, or Brother Uriah in order to access a Grand Revel adventure.

    Plant bosses: There are plenty of evil trees that need to be chopped down through the game, but there are a couple in The Mad Wizard adventure in the Grand Tour of the Sword Coast campaign that make easy targets. Seek out the Shambling Mound in area 25 or the Treant in area 30.

    Resurrected Hero of the Vale: This poor guy keeps getting resurrected just so you can kill him again. He appears in both the Highharvestide and Feast of the Moon event adventures, as well as several other adventures. If neither event is available, check out The Mists of Ravenloft adventure in the Grand Tour of the Sword Coast campaign, or Resolve Amongst Chaos in the Baldur's Gate: Descent Into Avernus campaign.

    Segmented health: Creatures with segmented health are available on many different adventures. Bosses with hit-based or armor-based health will count towards this quest. The Tyrannosaurus Zombie on area 50 of Running of the Saurs in the Tomb of Annihilation campaign is a great early-game example of a segmented health boss!

    Undead bosses: You can cleanse the world of stinky undead in many adventures. Might we suggest the Upright Crawling Claw in The Mad Wizard adv-- wait, no. This one isn't in the Mad Wizard adventure. Instead, load up the Unearthed Evil adventure in the Grand Tour of the Sword Coast campaign. It's good to have some variety.

    Undead enemies: Undead monsters are available in many different adventures. If you are looking for a good target to encounter undead, you can find Zombies in Terror in the Dark - the fourth adventure in the Grand Tour of the Sword Coast campaign.

    December 20th, 2023
    Idle Champions: Wintershield 7 
    Posted in Idle Champions.

    Wintershield sees a celebration of maps in the Realms, symbolizing our paths through the new year. As part of this year's tradition, the Champions have purchased a map from a Waterdeep street vendor. Then it started talking...

    Wintershield 7 introduces Wyll, the Human Warlock from Baldur's Gate 3, and brings back two Heroes of Baldur's Gate-aligned Champions: Imoen the Human Rogue/Wizard, and the Viconia DeVir the Drow Cleric of Shar! Players have until Monday, January 1st, 2023 at 12 PM Pacific to complete their Wintershield 7 unlocks and objectives.

    Wyll


      From a scion of a famed Baldurian house to a life of adventure on the road, Wyll’s life as the monster hunter called the Blade of Frontiers has made him one of the beating hearts of the Sword Coast. While he has done great deeds for the Coast’s people, the source of his power remains secret. The cambion Mizora drew Wyll into a warlock’s pact in a moment with many lives at stake, and cursed him with the duty of hunting her enemies. Mizora only asks Wyll to sacrifice devilish creatures to her, but a cambion’s ambitions are ever fickle, and Wyll wishes to escape the pact before its price grows cruel.

    Wyll is a Support Champion ready to help whoever he can, so he supports all heroes from the most represented race, class, or affiliation in the formation. He is also cursed with a mind flayer's tadpole, providing further boosts with all of the Absolute Adversaries. This Human Warlock can be found in Seat 12 opposite Arkhan. You can find out more in the Wyll Champion Spotlight.


    Year Seven Variants


    Defender of the Innocent - Help a poor map find its way home for the holidays with Wyll!
    • Wyll joins the formation (Slot 5). He can be moved, but not removed.
    • Only Champions from the most represented races, classes, and affiliations in the formation may deal damage.
    • Getting to know Wyll: Wyll's support abilities target the most represented race, class, or affiliation in the formation. Which trait are you going to build around?
    • Reach Area 75.

    The Infernal and the Demonic - Help a poor map find its way home for the holidays as Wyll teaches Tiefling children how to fight!
    • Wyll joins the formation (Slot 5). He can be moved, but not removed.
    • Squiddy also joins the formation to be taught how to fight by the Blade of Frontiers!
    • Each wave spawns an additional fiend. These foes don't drop gold nor count towards quest progress.
    • Getting to know Wyll: Wyll's favored foes are Fiends, so the formation deals more damage against them when Wyll is in the formation.
    • Reach Area 125.

    Reading the Fine Print - Help a poor map find its way home with advice for Wyll's Pact boon!
    • Wyll joins the formation (Slot 5) He can be moved, but not removed.
    • You may only use Champions with a melee or magic attack. And Astarion, 'cause he's special.
    • Only Wyll and Champions with a familiar assigned to level them up can deal damage.
    • Getting to know Wyll: Wyll's favored foes are Fiends, so the formation deals more damage against them when Wyll is in the formation.
    • Reach Area 175.

    We would love to hear about your experiences in Idle Champions on the Idle Champions Subreddit, on the Steam forums, or on the Official Idle Champions Discord!


    November 29th, 2023
    Idle Champions: Simril 7 
    Posted in Idle Champions.

    Someone outside Luskan has been pillaging the food stores in advance of this year's Simril celebration. Residents are becoming worried that there may not be enough to last the long Sword Coast winter to come!

    Simril 7 introduces Shadowheart, the half-elf Cleric of Shar from Baldur's Gate 3! Simril also brings back Warduke, the legendary mercenary for hire human fighter, and Yorven Springpaw, the resident murder bunny Harengon Barbarian Druid! Players have until Monday, December 11th at 12PM Pacific to complete their Simril 7 unlocks and objectives.

    Shadowheart


      A devoted cleric of Shar, Shadowheart agreed to have her memories wiped as part of a holy mission. Now its sole survivor, she must deliver a powerful relic back to her kin in order to win Shar's love and have her memories restored – but all the while, she is tormented by strange, painful magic that she struggles to understand.

    Shadowheart is a Support and Healing Champion who joins her fellow Baldur's Gate 3 companions in fighting the transformation into a Mind Flayer. Once unlocked, you can find this Half-Elf Cleric in seat 6 opposite Asharra. Learn more about Shadowheart in her Champion Spotlight!

    Year Seven Variants


    Witness Our Adoration - Simril is ruined! Shadowheart is mad that someone has pilfered the food supplies!
    • Shadowheart joins the formation (Slot 4). She can't be moved or removed.
    • Only Shadowheart and Champions within two slots of her can deal damage.
    • Getting to know Shadowheart: Shadowheart increases the damage of all Champions within two slots of her. Place your damage dealing Champions to take advantage of this!
    • Reach Area 75.

    Childhood Fears - Simril is ruined! A wolf has pilfered the food supplies!
    • Shadowheart joins the formation (Slot 4). She can be moved, but not removed.
    • A wolf also joins the formation. It's so scary that Champions next to it deal no damage with their normal attacks.
    • Every 5 seconds, the wolf bites a Champion directly in front of it, dealing damage equal to 20% of the Champion's total health.
    • Getting to know Shadowheart: Shadowheart heals Champions in the two columns ahead of her. Place her to protect your tanks and anyone else that might be getting hurt!
    • Reach Area 125.

    Duplicity without Duplicates - Simril is ruined! Someone has requests all the Champions have unique Dexterity scores!
    • Shadowheart joins the formation (Slot 4). She can be moved, but not removed.
    • Each Champion in the formation must have a unique DEX score.
    • Getting to know Shadowheart: Shadowheart summons an Illusionary Duplicate in the same slot as the Champion with the highest DEX. The Duplicate buffs and heals nearby Champions similar to Shadowheart herself.
    • Reach Area 175.

    We would love to hear about your experiences in Idle Champions on the Idle Champions Subreddit, on the Steam forums, or on the Official Idle Champions Discord!


    November 22nd, 2023
    Idle Champions: The Glitches are Coming!  
    Posted in Idle Champions.

    Turn of Fortune's Wheel continues! The Champions find themselves in Sigil - the City of Doors - and with the help of Mrs. Fox discover they are Glitches in the Multiverse. Under her advice, the Champions set out into Sigil to find out who they are and why this is happening to them. But other forces are moving in Sigil, and they soon find themselves on the run for their lives!

    Also starting today is the Glitch Emergence Event along with Glitch Skins & Feats for many Champions! Read on to learn more!

    Note: you will need to have completed the previous two Turn of Fortune's Wheel adventures, The Beginning is the End and The End Is The Beginning, in order to access these new adventures.


    Welcome to Sigil

    Explore Sigil and learn more about the predicament you find yourself in.
    • Variant: Misaligned in Sigil - Explore Sigil with a diverse set of Champions!
      • All Champion damage is reduced by 99% for each Champion in the formation that shares an exact alignment with another Champion in the formation, stacking multiplicatively.
      • Two fools join the formation. They just get in the way.
      • Complete area 400

    Fast Food

    Elude the Harmonium Peacekeepers while you try to stock up on rations and gear.
    • Adventure Variant: Chaos Theory - Elude the Harmonium Peacekeepers with a group of chaotic lawbreakers!
      • You may only use Chaotic Champions.
      • 1-2 additional Harmonium Peacekeepers spawn with each wave. They don't drop gold or count towards quest progress.
      • Complete area 450


    When the Champions were brought to Sigil in the second Turn of Fortune's Wheel adventure, they had lost their memory, and they each looked a bit different!

    With the release of Fortune's Wheel 2, we're debuting the first batch of Glitch Skins & Feats! The 5 main speakers from Turn of Fortune's Wheel (Calliope, Freely, Havilar, Nayeli, and Orkira) now have their Glitch Skins & Feats available via Skin & Feat Packs in the in-game shop. Hitch & Sentry also have Glitch Skins and Feats available via the Thayan Enclave (see the Glitch Emergence below).

    Equipping a Glitch Feat will allow a Champion to also count as the race matching their Glitch Skin (whether or not the Skin is active), and also grant a boost based (normally) on the number of Champions of that race in your formation! We hope these Glitch Feats will create new formation options for you to enjoy!

    Glitch Feat
    Nayeli Githyanki Glitch Feat
    • Calliope: Calliope counts as a Harengon. Increases the effect of Calliope's Bardic Inspiration ability by 20% (additively) for each Bard in the formation.
    • Freely: Freely counts as an Aasimar. Increases the effect of Freely's Unlucky for Them Ability by 20% (additively) for each Aasimar in the formation.
    • Havilar: Havilar counts as a Half-Elf. Increases the effect of Havilar's Battlemaster Ability by 20% (additively) for each Half-Elf in the formation.
    • Nayeli: Nayeli counts as a Githyanki. Increases the effect of Nayeli's Aura of Courage ability by 20% (additively) for each unique race in the formation.
    • Orkira: Orkira counts as a Half-Elf. Increases the effect of Elemental Fire by 20% (additively) for each Half-Elf in the formation.
    • Hitch: Hitch counts as a Centaur. Increases the effect of Hitch's Natural Performer Ability by 20% (additively) for each unique race in the formation.
    • Sentry: Sentry counts as a Half-Elf. Increases the effect of Sentry's Guardian of Solwynn ability by 20% (additively) for each Half-Elf in the formation.


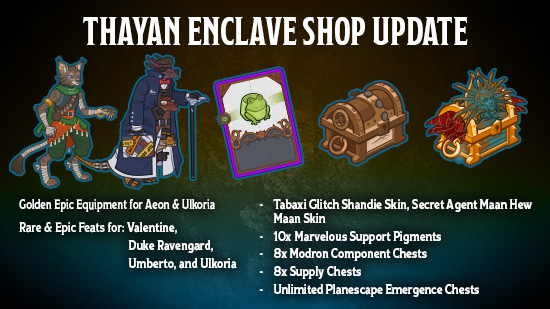
    There's a problem in the Multiverse and it's spilling into Faerûn! Glitched versions of multiple Champions are causing all sorts of trouble - it's up to you and your formations to stop them! Protect the Forgotten Realms and unlock exclusive rewards in the Thayan Enclave Shop during the Glitch Emergence Event, which runs from November 22nd at noon Pacific until Friday, December 1st at noon Pacific!

    During Emergence Events, Corrupted Gems can be collected from the designated monsters (in this case Glitched Champions), and by completing a daily quest visible in the Emergence Event dialog. Use the Corrupted Gems in the Thayan Enclave Shop to collect any of the items below and the remaining items from the Mind Flayer Emergence.

    New Items Added to the Thayan Enclave!

  • Two Golden Epics
    • Jang Sao Slot 5 - Lunation (20,000 Corrupted Gems)
    • Sisaspia Slot 5 - Scimitar of Dendar (20,000 Corrupted Gems)
  • Four Feats
    • Hitch - Centaur Glitch (10,000 Corrupted Gems)
    • Sentry - Half-Elf Glitch (10,000 Corrupted Gems)
    • Warden - Gibbous Script (10,000 Corrupted Gems)
    • Warden - Specter of Aeons (10,000 Corrupted Gems)
  • Two Skins
    • Centaur Glitch Hitch (10,000 Corrupted Gems)
    • Half-Elf Glitch Sentry (10,000 Corrupted Gems)
  • 10x Marvelous Support Pigments (7,000 Corrupted Gems)
  • 8x Modron Component Chests (2,500 Corrupted Gems)
  • 8x Supply Chests (2,500 Corrupted Gems)
  • Unlimited Glitch Emergence Chests (2,500 Corrupted Gems)
    • Contains gear for: Jang Sao, Sisaspia, Hitch, Sentry, and Warden


  • You can find all this information, and even more details, in-game!

    We would love to hear about your experiences in the Outlands on the Idle Champions Subreddit, on the Steam forums, or on the Official Idle Champions Discord!

    November 8th, 2023
    Idle Champions: Season 6 Overview 
    Posted in Idle Champions.

    Season 6 focuses on five unaffiliated Champions with high DEX scores. In the Season 3 mid-season survey we asked you to vote on what Champions you'd like to see reworked in a future season, and these five Champions were all in the top half of the field. They are: Zorbu (seat 12, voted #1), Warden (seat 11, voted #5), Sisaspia (Seat 1, voted #10), Nrakk (seat 8, voted #11), and Korth (seat 2, voted #14). Read below to learn more about these Champions, and the details you need to know about Season 6!

    The focus of Season 6's redesign was to modernize these five older Champions and add new high-DEX formation options to the game. DEX is one of the highest average stat scores in the game, so there are plenty of other highly dexterous Champions to synergize in your formation alongside these five.

    We're also trying something new with Season 6: we have removed daily quests and shortened the overall length of the season, redistributing Daily Quest XP to the Seasonal and Milestone Quests. This should allow you more flexibility in when and how you go after your season progress, while still giving you access to a similar total amount of experience.

    The changes outlined below are live as of 12:00PM PT on Wednesday, November 8th, when Season 6: Elemental Rebirth kicks off!

    Table of Contents


    Season 5: Acquisitions Incorporated

    Champion Overview

    Zorbu (Seat 12)

    Omin
    Zorbu received the most votes out of any Champion in the season 3 survey, but his kit was actually already pretty solid. Zorbu has begun seeing a trauma counselor regarding his unfortunate past, and thus several of his abilities have received name changes as his rage has subsided. With his kit already being quite powerful, our main goal with Zorbu this season was to ensure you could build the rest of the formation around him, and give him some interesting positional options in high DEX formations.

    Zorbu's is a hunter first and foremost. His first ability, Know Your Enemy, gains stacks as you kill certain types of enemies. These stacks persist between adventure resets, so the more you use Zorbu, the higher they get, increasing his power in a way that is unlike almost every other Champion in the game. Zorbu deals additional damage against specific types of enemies, but also deals more against all enemies thanks to Focused Fury, which increases his damage based on the total number of Know Your Enemy stacks he has. Zorbu's main support ability is Hunter's Pack, which increases the damage of adjacent Champions with a high DEX score. Zorbu himself also benefits from this buff via his new Expert Hunter ability.

    Specializations: Zorbu's specializations offer a choice between farming more stacks of Know Your Enemy, or boosting Zorbu's damage and support to a massive degree. Lead the Pack buffs Hunter's Pack based on your Focused Fury bonus, while Hunting Partners causes Know Your Enemy to stack up faster if Zorbu is adjacent to more high DEX Champions.

    Using Zorbu: Whether you're using Zorbu as a DPS or a Support Champion, you're going to want to position him adjacent to as many high DEX Champions as you can, which is made easier thanks to the season reward feat Wolf Pack, which actually increases the DEX score of adjacent Champions, meaning you can use him with some Champions that wouldn't normally qualify for Hunter's Pack.

    Warden (Seat 11)

    Evelyn
    Warden was our next highest voted Champion, and for good reason. This bad-ass Warforged Hexblade Warlock was an exceptionally popular DPS Champion when they debuted in Simril Year 2, but their simple kit had fallen by the wayside in recent years and they were in desperate need of a rework. Their new kit includes an army of accursed spectres that dart around the field providing a visual symphony worthy of this epic Champion.

    Hex is Warden's main dps and support ability. This debuff increases the damage that enemies Warden attacks take from all sources. Initially, Warden can only Hex each enemy once, but level them up enough and you'll unlock Relentless Hex, which allows Hex to stack up to four times on each enemy. Warden's secondary ability is Accursed Specter, which causes a specter to appear whenever an enemy afflicted by Hex is killed. These specters cause nearby enemies to take even more damage, making Warden the undisputed authority of debuff-based damage. Specter Rush allows the specters to move around the battlefield, rushing towards targets that Warden attacks and then slowly drifting past them to increase the damage they take from allied Champions. Master of Hexes allows Hex to spread all by itself when an enemy is killed near an Accursed Specter. Finally, Cloak of Flies causes Warden to do area damage when they attack, based on the highest number of Hexed enemies that have existed in the area.

    Specializations: Warden's specializations all increase the maximum number of Accursed Specters that can be active at once. The Dark Hunger increases it based on the number of Evil Champions in the formation. Shadows In The Night instead increases it based on the number of high DEX Champions in the formation. Finally, if neither of those tickle your fancy, Charm of the Fallen increases the max specter count based on the number of Champions with Charisma as their highest stat score.

    Using Warden: As one of the few Champions without any positional formation abilities, Warden has a lot of flexibility on where they are used. When using them as a DPS, position them so that the rest of your support Champions buff them, and when using them as a Support, position them wherever you have an empty slot that needs filling. Regardless of how you use them, stack your formation with Champions that meet the requirements of your chosen specialization to really benefit from having plenty of Accursed Specters on the field at once.

    Sisaspia (Seat 1)

    Jim
    Sisaspia has always been one of our favorite Champions, and we were excited to see her in the top half of the votes. She has received several desperately needed quality of life buffs that should bring her power level up to a well-deserved "solid". We did have to fudge her ability scores just a little bit to make her fit in with the high DEX crowd, but, I mean, she's part snake. It makes sense.

    Sisaspia's main mechanic is her Halo of Spores, which swirl around her until enemies approach the formation. She then psychically blasts her spores into enemies, causing them to take more damage over time when hit. Normal enemies can be afflicted by several spores at once, while bosses can have even more infesting their bodies. Sisaspia's positional buff, Symbiotic Infection, buffs Champions near her based on the number of spores she has infected her enemies with in the current area, and Symbiotic Healing heals damaged Champions using the same metric. Her final ability, Dance of the Spores, increases Sisaspia's spore reserve and potentially increases the range of her Halo of Spores ability based on the average DEX score of all Champions in the formation. The higher, the better.

    Specializations: Sisaspia's specializations are useful in a variety of different situations. The most straightforward is Simple Infection, which increases the effect of Symbiotic Infection. Spreading Spores increases the rate at which Halo of Spores creates new spores, and increases the maximum. Finally, Fungal Body greatly increases Symbiotic Infection and Healing, but only after Sisaspia has blasted out a certain number of spores in the current area.

    Using Sisaspia: Position Sisaspia within 2 slots of your main damage dealer to provide excellent support via Symbiotic Infection. Make sure she's also within 2 slots of your tanks if you'd like her to help keep them alive, too. Since she'll heal everyone nearby, she's useful near the center of your formation if you're in an adventure or variant where everyone could take damage at any time.

    Nrakk (Seat 8)

    Strix
    Nrakk was a special Champion with some unique interactions with some abilities in the game. Unfortunately, some of these unique interactions needed to go in order to simplify both our job (balancing the game) and yours (finding weird ways that Nrakk could break the game). We have tried to compensate for this by updating Nrakk's kit and also giving him the most complicated ultimate ability in the world. We've also removed the dps role from Nrakk's kit, so he's purely a support Champion now.

    Nrakk's Way of the Kensai ability increases the damage of Champions ahead of and behind him. Nrakk can earn Ki Points by using his ultimate ability, Ki Blast. Ki Blast initially grants a few Ki Points and shoots a bolt of energy at a random enemy, but if you reactivate it at the right time it can fire off again and earn you even more Ki Points (and damage). Repeat this process to stack up as many Ki Points as possible, which you'll want to do because Ki Master increases Way of the Kensai based on the highest number of Ki Points you've had at once on the current adventure. Stunning Strike consumes a Ki Point to stun and increases the damage taken by enemies that Nrakk hits, while Kensai Cleave causes every 3rd attack to do a wide cleave. Perfect Self causes Nrakk's ultimate to cool down faster if he's out of Ki Points when he attacks enemies.

    Specializations: Nrakk's two specialization choices are super unique. Githzerai Focus increases the positional formation abilities of adjacent Champions with a high WIS score, while Githzerai Agility does the same for adjacent Champions with a high DEX score.

    Using Nrakk: You're going to want to plop Nrakk in the column directly in front of or behind your formation's main damage dealer. Ideally you're also going to want Nrakk to be adjacent to support Champions with positional formation abilities and stat scores that exceed the requirements of his chosen specialization. The exact right positioning and Champions may be challenging to discover, but when you do it will be worth it!

    Korth (Seat 2)

    Vi
    Korth was the most challenging Champion of the season for us to rework, as we had inadvertently duplicated many of his abilities on his powerful seat-mate Widdle. Making him stand out was a challenge, but the utility of his updated specialization should make him a good choice for augmenting your high DEX formations with some of the game's less agile Champions.

    Korth's Rapid Training increases the damage and attack speed of all high DEX Champions in the formation, regardless of his positioning relative to them. Lizardfolk Tactics causes him to mark enemies he attacks, increasing the damage they take from all attacks. Whenever a Champion attacks an enemy that Korth has marked, they gain a temporary hitpoint shield thanks to Fighting Spirit, with tanks getting an even bigger shield. Calculated increases the effect of Rapid Training based on the formation's total DEX score, and Group Tactic further buffs the ability based on the number of Marked enemies in the current area. Finally, Strength Before Death causes Korth to make an ultimate attack against enemies who attempt to do a killing blow on him or his allies. This can only occur a few times before it goes on cooldown, but could be the difference between success and failure in a tough area.

    Specializations: Korth's Samurai Training specializations are totally unique and provide a level of customization in your formations that you've never seen before. Depending on the spec you choose, Korth will increase the DEX score of the affected Champions to 16. You can target the two slots directly in front of, directly behind, or directly above and below Korth.

    Using Korth Since Korth's buffs are global, his positioning in your formation should be entirely focused on who you want to affect with his Samurai Training specialization. Place two lower DEX Champions in the targeted slots in order to integrate them into your high DEX formation and potentially make them eligible for other Champions' DEX-based buffs.

    Season 6: Elemental Rebirth

    Key Season Rewards

    As with last season, the marquee rewards are at level 60. After that, you begin to earn Bonus tokens for every level (two tokens per level for Season Pass purchasers). Each token can be redeemed for one of the 15 unique bonus rewards.

    Once a reward has been earned, it cannot be earned again until each type of reward has been earned. Once all rewards are earned, your odds reset. Your odds of a specific type of reward when none have been earned are approximately as follows:

  • Champion iLevels: 33%
  • Gems: 13%
  • Modron Component Chest: 13%
  • Season Chest: 13%
  • Blacksmithing Contracts: 6.5%
  • Bounty Contracts: 6.5%
  • Supply Chest: 6.5%
  • Support Pigment: 6.5%


  • This season includes a new Dexterous Modron Core, a Golden Epic for Nrakk, a new familiar: Bash the Earth Elemental, Epic and Rare feats for all the Season Champions, and exclusive skins for those Champions! It also makes Marvelous DPS Pigments available for the first time since Season 4! Check out the Rewards track in-game for more detail.

    Rewards:

    Available to All Players

    • Golden Epic: Nrakk Slot 1
    • Modron Core: Dexterous Modron Core
    • Rare Feats: Zorbu, Warden, Sisaspia, Nrakk, Korth
    • Item Level Boosts
    • Chests
    • Epic Potions and Scrolls
    • Gems

    Available to Passholders

    • Familiar: Bash the Earth Elemental
    • DPS Pigments
    • Week-long Potions
    • Epic Feats: Zorbu, Warden, Sisaspia, Nrakk, Korth
    • Elemental Skins: Zorbu, Warden, Sisaspia, Nrakk, Korth

    Season 6: Elemental Rebirth

    Keywords and Key Abilities

    Throughout the season, various quests may reference certain keywords and abilities. Here is a quick reminder on some of those!

    BUD-setting: BUD stands for Base Ultimate Damage. Your 'BUD' is based on the DPS of the highest hit that any Champion has recently achieved against a single enemy. Bud-setting Champion, means the Champion who has most recently done the most damage.
    • On PC UI, this is visible by mousing over the lightning bolt banner to the left of your Ultimate Attack buttons.
    • On Console UI, this is visible by looking to the right of your ultimate bar, on the graphic labeled with 'Ult DPS'.
    Event Adventures: Event Adventures are only available in two ways: When the corresponding event is active, or when a time gate for a Champion that was originally available in that event is opened. Event Adventures are home to many unique bosses and creatures, however, some of them can be found outside of their original events in permanent adventures.

    Patron Challenges: The Patron system allows you to re-play adventures and variants with additional restrictions, resulting in influence and currency that you can spend in a Patron's given shop. Once you have unlocked a Patron, they will provide you with ten challenges that refresh every Monday at Noon Pacific Time.
    • On PC UI, Patrons are accessible through a button on the upper left UI.
    • On Console UI, Patrons are accessible in the UI buttons above the Champion seats.
    Positional Formation Abilities: Positional Formation Abilities are abilities that trigger based on where a target is in the formation.

    Time Gate Adventures: A Time Gate allows you to unlock Champions from previous events you may have missed and/or gear them up for free. You need 6 Time Gate Pieces to open a Time Gate for a Champion, though they open naturally every 2-3 weekends.
    • On PC UI, Time Gates are accessible through a button on the upper left UI.
    • On Console UI, Time Gates are accessible in the UI buttons above the Champion seats.
    Season 6: Elemental Rebirth

    Key Enemies

    Throughout the season, various quests may reference certain types of enemies. Here is a quick reminder on where to find some of those!

    Abominable Yeti: The Abominable Yeti is the area 50 boss in any of the Simril event adventures, but if that event has ended you can find them as the first boss in the first adventure of the Icewind Dale campaign, The Giant's Bane Tavern. They can be found in several other adventures as well.

    Beasts: Beast monsters can be encountered in most adventures. If you are looking for a good target to encounter beasts, try The Cursed Farmer - the first (non-tutorial) adventure in the Grand Tour of the Sword Coast campaign.

    Demon Boss: Demon bosses are common throughout the Forgotten Realms, but the easiest one to farm can be found in The Cursed Farmer adventure in the Grand Tour of the Sword Coast campaign. Look for the Gnoll King in area 20.

    Demons: Demon enemies come in many freaky forms, however if you're early in the game you can find some in the The Mad Wizard adventure in the Grand Tour of the Sword Coast campaign.

    Fey: Fey are fairly common in the Witchlight Carnival campaign, but if you haven't unlocked it yet you can find several groups of Satyrs early on in the Grand Tour of the Sword Coast campaign in the Beast Intentions and The Mad Wizard adventures.

    Giant Bosses: You can find an Ice Troll ripe for farming in The Giant's Bane Tavern adventure in the Icewind Dale campaign (the very first adventure of the campaign). If that doesn't float your boat, or if your boat is frozen in the lake, there are several other targets scattered throughout the Forgotten Realms.

    Humanoids: Humanoid monsters can be encountered in many adventures. If you are looking for a good target to encounter humanoids, try A Mysterious Summons - the first adventure in the Waterdeep: Dragon Heist campaign.

    Mad Cultist of Cyric: The Mad Cultist of Cyric can only be found in the Feast of the Moon event adventure. If you missed their event, you can open a time gate for a Champion from Feast of the Moon, like Gromma, Sentry, or Jang Sao, and find this boss in any of their adventures.

    Overambitious City Guard: The Overambitious City Guard is a recurring boss. They can be found in the Merry Map Misadventure adventure in the Wintershield event, or if that event is not available then you should be able to find them in the first adventure of the Waterdeep: Dragon Height campaign.

    Plant Bosses: Plant bosses are rare, but not impossible to find. If you're looking for easy prey, you can find a Shambling Mound in The Mad Wizard adventure early on in the Grand Tour of the Sword Coast campaign, as well as in many other adventures throughout the game.

    Resurrected Hero of the Vale: If you are looking for a good target to encounter the Resurrected Hero of the Vale, try the Highharvestide adventure: The Bandit's Harvest or the Feast of the Moon adventure: The Crypt of Legends. You can access The Bandit's Harvest by opening a Time Gate to Stoki, Farideh, Pwent, Torogar, D'hani, or Egbert. You can access The Crypt of Legends by opening a Time Gate to Gromma, Sentry, Penelope, Widdle, or Virgil.

    Segmented Health: Bosses with segmented health are available on many different adventures. Bosses with hit-based or armor-based health will count towards this quest. The Tyrannosaurus Zombie on area 50 of Running of the Saurs in the Tomb of Annihilation campaign is a great early-game example of a segmented health boss!

    Wearer of Purple: The Wearer of Purple is a boss from the Wintershield event, so you can easily find them during that event or in a Wintershield time gate. They also appear in the 12th adventure of the Waterdeep: Dragon Height campaign: Waterdeep Under Siege.

    Winter Wolf Alpha: You can find Winter Wolf Alpha bosses in many adventures, especially several in the Icewind Dale campaign (such as the very first adventure, The Giant's Bane Tavern). However, the easiest place to find them is in any Simril event adventure (in area 15).

    Undead: Undead monsters are available in many different adventures. If you are looking for a good target to encounter undead, you can find Zombies in Terror in the Dark - the fourth adventure in the Grand Tour of the Sword Coast Campaign.

    October 11th, 2023
    Idle Champions: Patron Currency Update 
    Posted in Idle Champions.

    Well met adventurers!

    Last week we announced changes to Patron Currency rewards due to egregious scaling issues at the upper echelons. The response from players was immediate, and we want you to know that you have been heard loud and clear.

    It is clear that this system could not be left as it was. However, it is also clear based on your feedback that we missed the mark. With that feedback in mind we have made additional adjustments to the Patron Currency reward scaling, which you will find below.

    First, some context: while the previously announced rewards scaled linearly at 12 times the area requirement, the updated reward structure now increases that multiplier on variants with higher area requirements.

    • For the Patron Variants requiring area 1325 to be cleared, the new currency reward has been increased from 15,900 to 50,350, meaning players will be able to collect 10 Patron Chests instead of 3.

    • Completing every Patron Variant currently available in the game will allow players to collect 2,959 Patron Chests across the four existing Patrons -- an increase from 1,803 Patron Chests using the previous 12x linear scaling.


    We acknowledge that this is still a significant change from the previous exponential rewards behavior. However, the bulk of this change occurs across only a handful of adventures:

    • For Patron Variants requiring you to beat up to area 500 (58% of the total patron variants), this update more than doubles the amount of Patron Currency earned.

    • For Patron Variants requiring you to beat up to area 1000 (39% of the total patron variants), this represents a 40% decrease in Patron Currency earned.


    Here is a breakdown of the currency rewards (and equivalent Chest count) with the previously announced 12x linear scaling, and the new scaling that is going live today. As you can see, newer players are able to collect chests sooner, and the rewards for the higher-level variants are scaled up in a way that reflects the time investment to get there. It is also important to note that the majority of available adventures will have their rewards increased.

    Area Requirement 12x Linear Scaling (Previously Announced) New Scaling (Based on Feedback)
    300
    3,600
    3900
    400
    4,800
    6000 (1 Chest)
    500
    6,000 (1 Chest)
    9,000 (1 Chest)
    600
    7,200 (1 Chest)
    12,000 (2 Chests)
    700
    8,400 (1 Chest)
    15,400 (3 Chests)
    800
    9,600 (1 Chest)
    20,000 (4 Chests)
    900
    10,800 (2 Chests)
    24,300 (4 Chests)
    1000
    12,000 (2 Chests)
    30,000 (6 Chests)
    1100
    13,200 (2 Chests)
    35,200 (7 Chests)
    1200
    14,400 (2 Chests)
    42,000 (8 Chests)
    1300
    15,600 (3 Chests)
    48,100 (9 Chests)


    Overall, we believe these changes are important for the long-term health of Idle Champions. As always, and especially now, we appreciate your dedication to the game and your feedback.

    September 26th, 2023
    Idle Champions: Season Bonus Quests 
    Posted in Idle Champions.

    As we continue to improve Seasons in Idle Champions and listen to our community feedback one thing has become clear. There needs to be more quests for players to either progress through a season faster, to catch up, or to just unlock additional bonus tokens. That is why starting Wednesday, September 27th, we are adding Bonus Quests to our Idle Champions Seasons.

    Read on to learn more about these additional quests!

    Season 5: Acquisitions Incorporated

    Bonus Quest FAQ

  • What Are Bonus Quests?

    Bonus Quests are a new type of Season Quest that appear during Seasons in the Seasons dialog. These extra quests award additional Season XP which can be used to speed up your progress through a season or earn additional Bonus Tokens. The additional Season XP from Bonus Quests is not required to complete the Season Reward Track (aka. reach level 60) and therefore you do not need to do any Bonus Quests to complete a season if you don't want to.

  • When Do Bonus Quests Start?

    Bonus Quests will come to Season 5 during its fifth week starting on September 27th.

  • What Goals Will Bonus Quest Have?

    You can expect to complete these Bonus Quests in the following ways:
    • Completing new Adventures, Variants, and Patron Variants
    • Completing limited time Events
    • Doing deep runs (high area/gold/damage targets)
    • Gearing up Champions
    • Unlocking/Completing the Trials of Mount Tiamat
    • Collecting unique unlocks (Evergreen Champions/Split the Party/etc.)
    The biggest difference between Bonus Quest goals and Core Quest goals is that not all the goals will be necessarily obtainable by all players. Some goals may push players to perform better than they have ever done before, or unlock content they may have not even known existed.

  • Will All Bonus Quests Unlock at the Same Time?

    No, new Bonus Quests will unlock over time throughout the remainder of Season 5.

  • How Long Will Bonus Quests Be Available?

    Each Bonus Quest is available for a fixed amount of time; generally 5-10 days, with some exceptions. All Bonus Quests will end before the end of the season.

  • Will All Bonus Quests Have the Same Goals For All Players?

    No, some Bonus Quests will have different goals depending on what you have completed before. For example, a quest might ask for you to deal a certain amount of damage during an adventure. The first time you complete one of these it might be e50 damage, but the next time it will go up to e100. These types of quests have a number of tiers for players to work through. Players will start at two tiers under the highest tier they have completed. Some Bonus Quests may not be offered to players who have already completed all the applicable content.

  • Where Can I Find Bonus Quest?

    Bonus Quests can be found in the updated Quest Tab (which you can see below). Bonus Quests will fall into categories that best match the goal of the quest. For example, in the image below, there is a Highharvestide category that has all quests that reward seasonal progress connected to that event.


  • Can We Get Any Spoilers?

    Sure. Here is a list of bonus quest categories that will appear in Season 5: Highharvestide, Oooh Shiny, Tiamat Must Die, Adventure Time, Split the Party, Gear Up, Keep Going, Time Gates, Liar's Night, Feats, Mirt the Moneylender, The Road to 100%, Let's Get Epic, Patron Callenges, Let's Get Legendary, Earning Mystra's Favor, Rare Accoutrements, and Expand Your Roaster.


  • We would love to hear about your experiences with Seasons on the Idle Champions Subreddit, on the Steam forums, or on the Official Idle Champions Discord!